A Crag Guide gives an extensive view of all sub areas and climbs at a point in the index. It shows a snapshot of the index heirachy, up to 300 climbs (or areas) on a single web page. It shows selected comments climbers have made on a recently submitted ascent.
At a minor crag level this should be suitable for printing and taking with you on a climbing trip as an adjunct to your guidebook.
This guide was generated anonymously. Login to show your logged ascents against each route.
Warning
Rock climbing is extremely dangerous and can result in serious injury or death. Users acting on any information directly or indirectly available from this site do so at their own risk.
This guide is compiled from a community of users and is presented without verification that the information is accurate or complete and is subject to system errors. By using this guide you acknowledge that the material described in this document is extremely dangerous, and that the content may be misleading or wrong. In particular there may be misdescriptions of routes, incorrectly drawn topo lines, incorrect difficulty ratings or incorrect or missing protection ratings. This includes both errors from the content and system errors.
Nobody has checked this particlular guide so you cannot rely on it's accuracy like you would a store bought guide.
You should not depend on any information gleaned from this guide for your personal safety.
You must keep this warning with the guide. For more information refer to our:
Usage policy
Contributors
Thanks to the following people who have contributed to this crag guide:
Oliver Story
Dane Evans
Campbell Gome
Brendan Heywood
Jakob Kapelj
John Wilson
mellor
One Day Hero
Duncan Brown
Stuart Anderson
The size of a person's name reflects their Crag Karma, which is their level of contribution. You can help contribute to your local crag by adding descriptions, photos, topos and more.
Alcuni contenuti sono stati forniti sotto licenza da: © Canberra Climbers' Association (CC BY-SA) © ANU Moutaineering Club (Creative Commons Attribution-Share Alike)
Table of contents
- 1.
Booroomba Rocks
375 in Crag
- 1.1. The Practice Boulder 3 in Cliff
- 1.2. Promised Land Boulders 2 in Cliff
- 1.3. Parachute Rocks 6 in Crag
- 1.4. Middle Earth Buttress 7 in Crag
-
1.5.
South Buttress 105 in Cliff
- 1.5.1. Integral face 19 in Cliff
- 1.5.2. Peter Pan Area 26 in Cliff
- 1.5.3. Possum area 41 in Cliff
- 1.5.4. Cocker's Gully 19 in Sector
-
1.6.
Middle Rocks / (including Cave Wall Lower Tier 72 in Sector
- 1.6.1. Hurricane Cracks Wall 8 in Sector
- 1.6.2. Descent track 30 in Sector
- 1.6.3. Lower Tier 34 in Sector
- 1.7. Cave Wall 15 in Sector
-
1.8.
North Buttress 147 in Sector
- 1.8.1. Determinant Sector 47 in Sector
- 1.8.2. Central Slabs 36 in Sector
- 1.8.3. Snickers Wall 7 in Sector
- 1.8.4. Echidna Slabs 14 in Sector
- 1.8.5. Northern Slabs 43 in Sector
- 1.9. Darwin Buttress 7 in Crag
- 1.10. Dirty Harry Rocks 9 in Crag
- 1.11. Redacted 1 2 in Crag
- 2. Index by grade
1. Booroomba Rocks 375 routes in Crag
- Summary:
-
Per lo più Arrampicata trad
Lat / Long: -35.561862, 148.992912
sommario
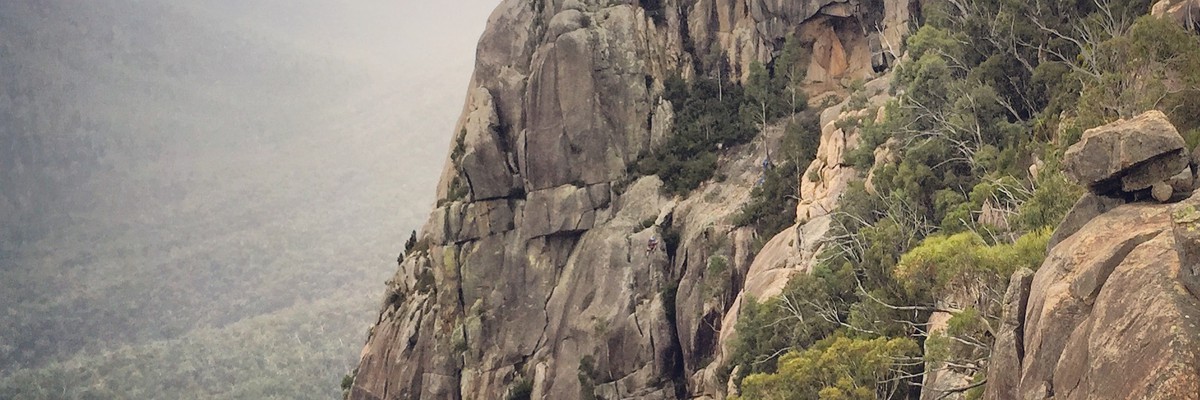
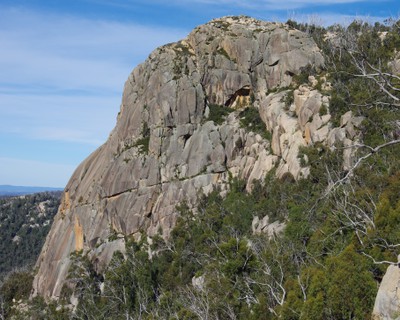
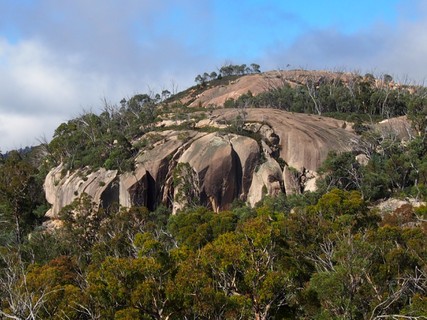
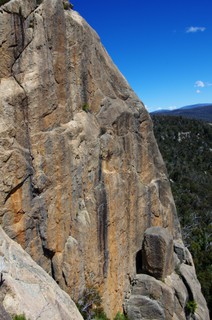
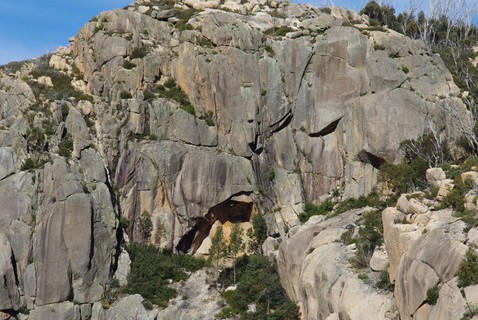
Like much of Canberra, Booroomba showcases the qualities of granite.
descrizione
Booroomba Rocks is one of the classic traditional areas of Canberra, and often considered one of the gems of Australian climbing. However, it is a pretty serious crag and should be approached with caution. A large, proud cliff that can be seen from Canberra, it is home to the tallest climbs in the A.C.T. Expect adventure and come prepared with your rack and a strong lead head.
If you're an idiot walking straight out of the gym/sport climbing world expecting to safely lead routes at this crag without exercising judgement, you're going to have a bad time. Your safety is 100% your own responsibility. Start with the assumption that the whole crag is R rated and work backwards from there.
limitazioni per l'accesso
As of May 2021, the crag remains affected from the January 2020 fires: https://canberraclimbing.org.au/access-submissions/booroomba-rocks-after-the-fires/
avvicinamento
Drive to Tharwa and continue south on the Naas road for about 10 kilometres, then turn right onto Apollo Road towards the site of the Honeysuckle Creek Tracking Station (Apollo Road is the turnoff to the right at the top of the hill above Naas). Follow Apollo Road for 8.9 kilometres, turning right about 400 metres before the old Tracking Station site. Follow this track for about 2.5 kilometres until you reach the carpark. The road is usually passable in two wheel drive vehicles, noting that there is one steep section that will require a bit of grunt or a run up. Booroomba Rocks is signposted - take the well trodden path that starts on the northern side, grunt uphill for about twenty minutes to a fireplace and campsite.
Map of crag and some key climbs here: https://www.google.com/maps/d/edit?mid=1h2pUec53ofWIJ-aew9eXpK8r-Xs&usp=sharing
50m straight ahead is the lookout above Middle Rocks; to the left is the track down to the South Buttress and Cocker's Gully; and to the right is a track to the Cave Wall area and the top of the North Buttress. 50m to the left (looking out) of the Middle Rocks lookout is a track that doubles back under the lookout, down through Middle Rocks to the base of the North Buttress, Central Slabs, Snickers Wall and the Northern Slabs.
dove alloggiare
The most pleasant camping is at Honeysuckle campground (the site of the old tracking station), with grassy sites, toilets, tank water and a plethora of boulders to play on.
etica
The ethic at Booroomba is generally staunchly traditional. Most climbing goes either entirely on gear or gear with bolts for those walls where there is insufficient gear to protect climbs. Climbs are occasionally rebolted, but retro-bolting would be considered vandalism of the lowest order.
storia
The first climbs at Booroomba Rocks were put up around 1966, and from then it saw consistent development from a number of very skilled granite climbers. Up to the 1980s, routes were established ground up by climbers walking to the base and finding their way to the top. No effort was made to make things safe for later climbers. Unlike sport crags, these routes aren't products designed to be climbed safely. Unless you're prepared for a long slow learning curve, you won't be as good at slab climbing as the people who put these routes up and you probably lack the skills and nerve to approach them safely. If you try to get into a tough guy comp with the best Booroomba climbers of the 70s and 80s it's quite likely that you'll lose and die.
Bolts started appearing over the years on a number of climbs, though never very many and only to accompany natural gear where possible. Since then a handful of climbs have been added that go purely on bolts, simply due to the lack of opportunities for natural protection. However, the prevailing style here is placing gear and adventurous climbing.
 |
1.1. The Practice Boulder 3 routes in Cliff
- Summary:
-
Arrampicata sportiva e Arrampicata trad
Lat / Long: -35.561931, 148.992843
descrizione
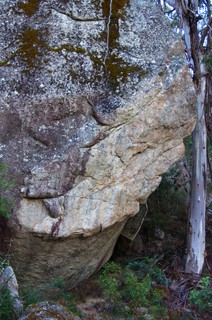
This is the ship-sized block you walk around about half-way up the Booroomba walk-in track.
| Route | Grade | Style | Selected ascents | |||||
|---|---|---|---|---|---|---|---|---|
| 1 |
★★ Practice Slab
Climb the block, leap the void onto the boulder - scramble to the top and retrace your steps. Once an initiation climb for the area and must only be climbed in volleys. Somewhat spookier now that it is mossy, but at least there's a log plugging the gap again. | 13 | 8m | |||||
 |
||||||||
| Route | Grade | Style | Selected ascents | |||||
| 2 |
★★ Doctor Slaughter
Climb the rightward leaning diagonal line of holds with four bolts. Pull round onto the arete and up easily to a bolt belay. FA: Mike Peck & Simon Carter, 1987 | 25 | 15m, 4 | |||||
| 3 |
★★★ Liquidation
Batman start. Excellent moves on an overhanging dyke of smooth granite on mostly big holds. 27 or 28. Tracciata: Justin Ryan, 2006 FFA: Justin Ryan, 17 Gen 2015 | 28 | 11m, 4 | |||||
1.2. Promised Land Boulders 2 routes in Cliff
- Summary:
-
Arrampicata trad e Arrampicata sportiva
Lat / Long: -35.559659, 148.994138
avvicinamento
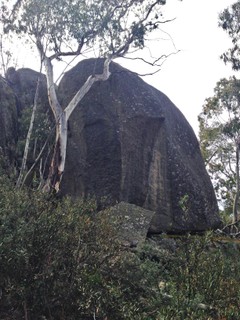
When walking up the Booroomba track from the carpark, about 300m before the top campsite and 100m to the right of the track is this large boulder distinctly marked by water runnels.
 |
||||||||
| Route | Grade | Style | Selected ascents | |||||
|---|---|---|---|---|---|---|---|---|
| 1 |
★★ The Promised Land
One of Booroomba's first modern face climbs, it takes a thin crack up the overhanging wall. FA: John Smart, 1978 | 24 | 10m | |||||
| 2 |
Operation Hydraulics
Painful slabbing. Start three metres right of 'The Promised Land'. Climb past 4 bolts, breaking through the pain barrier at the second. FA: Mike Law-Smith, 1982 | 24 | 10m, 4 | |||||
1.3. Parachute Rocks 6 routes in Crag
- Summary:
-
Arrampicata trad e Arrampicata sportiva
Lat / Long: -35.563065, 148.990909
descrizione
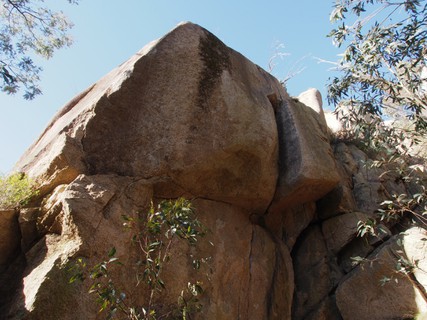
A couple of excellent cracks hidden in the shade on a small line of boulders about 100 metres above the grunt-in track.
limitazioni per l'accesso
Vegetation is slowly recovering from the 2020 fires, but there is no apparent damage to the rock at Parachute Rocks.
avvicinamento
Turn left off the walk-in track just before The Practice Boulder (or at the creek bed), and head diagonally uphill and left. The cliff is about 100 metres below and slightly left of 'Middle Earth'.
/1e/38/1e38b60a3f61b1ff14bd978a51521ba1744aa1a9) 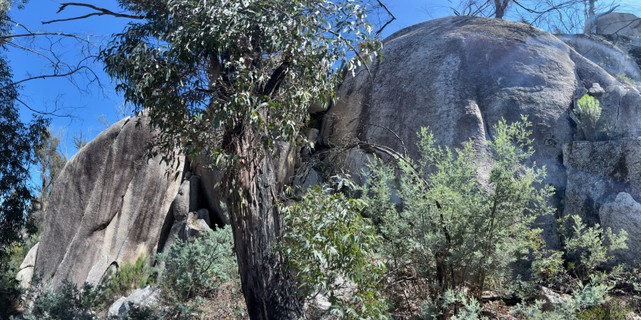    /5c/f5/5cf52a0fd997100a7c652e4be2c42cad0376fa94) |
||||||||
| Route | Grade | Style | Selected ascents | |||||
|---|---|---|---|---|---|---|---|---|
| 1 |
★ High Roller
The outstanding curving line 30 meters to the left. An easy start... But then the crack fades out. FA: John Smart, 1978 | 23 | 18m | |||||
| 2 |
Paratrooper
Two blocks right of High Roller is a good bolted route up the disappearing flake (gear to start). FA: Andrew Bull, 2023 | 23 | 25m, 5 | |||||
| 3 |
Tiny Tips
The middle line, overtaken by blackberries and leaves at last sight. A slabby start, then progressively thinner. FA: John Smart, 1978 | 23 | 20m | |||||
| 4 |
★★ Crackers
A deceptively easy-looking rightwards-leaning crack just right of a pile of boulders forming a small cave. FA: John Smart, 1978 | 21 | 15m | |||||
| 5 |
Pending 1
The arete right of Crackers. Tracciata: Jamie Valdivia, 2022 | 20m, 5 | ||||||
/d8/11/d811319bc570e36fea3cd9ccb0ca9512fe11b756) |
||||||||
| Route | Grade | Style | Selected ascents | |||||
| 6 |
Drogue
The crag warm-up on nicely featured rock. From Crackers head right 20m, round the next bolted arete and across the small gully. FA: Jamie Valdivia, 2022 | 19 | 12m, 4 | |||||
1.4. Middle Earth Buttress 7 routes in Crag
- Summary:
-
Tutti Arrampicata trad
Lat / Long: -35.561720, 148.990460
descrizione
A small cliff with a few good cracks, south of the Booroomba lookout. The climbs are described from left to right. At the left-hand end is 'Five Cracks Wall'.
avvicinamento
Approach up the gully from The Practice Boulder, or by walking southwest from the top campsite over rock slabs to a granite dome. The cliff is across the gully from this.
  |
||||||||
| Route | Grade | Style | Selected ascents | |||||
|---|---|---|---|---|---|---|---|---|
| 1 |
Indelible Murtceps
The third crack from the left on 'five cracks wall'. Up the groove to the bulge then up the finger crack to the top. Tape recommended. FA: Roark Muhlen & Peter Mills | 22 | 25m | |||||
| 2 |
Orcrist
The fourth crack from the left on 'Five Cracks Wall' (a few metres right of 'Indelible Murtceps') with an overhanging start. Up past a tree to a chimney and hand crack. FA: Dick Hain & Bill Wilson, 1973 FFA: John Smart, 1978 | 22 | 25m | |||||
| 3 |
Tears of Rage
Start in the corner to the right of 'Five Cracks Wall'. Up the chimney to a ledge. Continue to a chockstone then swing left. FA: Dave Shirra & Bill Wilson, 1973 | 16 | 25m | |||||
| 4 |
Elendil
The chimney right of 'Tears of Rage'. FA: Bill Wilson & Dick Hain, 1972 | 16 | 20m | |||||
| 5 |
Mordor
The corner ramp with a crack just right of 'Elendil'. FA: Dick Hain & Bill Wilson, 1973 | 17 | 25m | |||||
 |
||||||||
| Route | Grade | Style | Selected ascents | |||||
| 6 |
★ Plastic Appearance
The crack on the left wall of the large corner 10 metres right of 'Mordor'. Climb up the corner on the right, then back left into the crack and up. The direct start up the crack makes it even better, but a fair bit harder. Gear to blue camalot. FA: Dave Shirra & Bill Wilson, 1973 | 16 | 25m | |||||
| 7 |
Cirith Ungol
The chimney corner two metres right of 'Plastic Appearance', starting at a crack four metres right of the corner. FA: Bill Wilson & his mates, 1973 | 6 | 20m | |||||
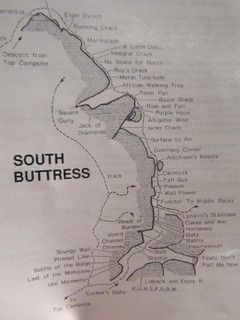
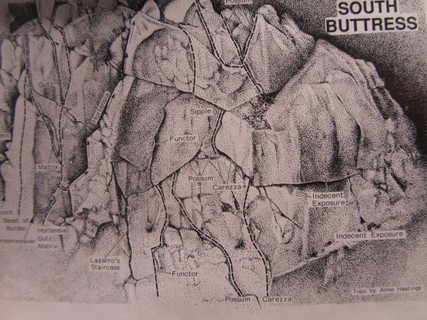
1.5. South Buttress 105 routes in Cliff
- Summary:
-
Per lo più Arrampicata trad
Lat / Long: -35.556946, 148.989730
descrizione
The South Buttress is shorter than some of the other areas at Booroomba, but packs a lot of punch nonetheless with a number of classic climbs. It rivals the North Buttress for popularity.
avvicinamento
*Warning - The tracks marked in the ACT guide have changed following the bushfires.
From the top campsite, follow the track left (west). The track splits on a few occasions but trend right, keeping the high point on your right and follow the track down a wide gully with obvious water washouts. Chossy boulders will be close on your right. The track will wrap back around the cliff line with 'Integral Crack' giving it away that you're on the right path.
 |
1.5.1. Integral face 19 routes in Cliff
- Summary:
-
Per lo più Arrampicata trad
Lat / Long: -35.557356, 148.989298
- Dangermouse - 35m to ground, or 25m to ledge then scramble off in the direction of the approach track. Serves Marmalade through to 'No Beans for Bonzo'
- Equanimity - 45m.
- African Walking Tree - 30m. Serves Roy's Crack through to In Daze of Old
descrizione
The Southern most cliff face of the South Buttress, up to 50m high with a variety of grades and styles.
avvicinamento
*Warning - The tracks marked in the ACT guide have changed following the bushfires.
From the top campsite, follow the track left (west). The track splits on a few occasions but trend right, keeping the high point on your right and follow the track down a wide gully with obvious water washouts. Chossy boulders will be close on your right. The track will wrap back around the cliff line with 'Integral Crack' giving it away that you're on the right path.
note per la calata
If you don't want to walk off, there are rap stations at the top of the following climbs:
  |
||||||||
| Route | Grade | Style | Selected ascents | |||||
|---|---|---|---|---|---|---|---|---|
| 1 |
★ Euryproctus
At the bottom of the descent track is a small roof split by a hand crack. Resist the temptation to jump on this climb just because it is the first one you see walking down to the south buttress; this route is responsible for putting more people off crack climbing than any other! If you must join the hall of fame, climb to the roof and up into the crack above. Strenuous. FA: Nick Taylor & Chris Larque, 1974 | 20 | 10m | |||||
| 2 |
★ Big Flake
Eight metres to the left of Euryproctus is a large flake leaning against the cliff. An awkward move to start, then easily to the top of the flake. Swing left into the corner and up the crack. FA: Tony Wood, Graham Horrocks & A. Wadsley, 1967 | 12 | 15m | |||||
| 3 |
★ The Eiger Direct
Start beneath the curving flake three metres right of Running Crack. Up the wall and flake then lunge right into a groove. Alternatively go straight up the wall from the top of the flake. FA: John Stone & Lincoln Hall, 1979 | 20 | 15m | |||||
| 4 |
★ Running Crack
A good intro to jamming. The crack 10 metres left of Big Flake; many people continue with the second pitch of Marmalade. FA: Peter Aitchison & John Price, 1967 | 12 | 12m | |||||
| 5 |
★ Walking Crack
The crack left of Running Crack - just not quite as good, and often slower with all the bushes. FA: Unknown | 10 | ||||||
| 6 |
★ Marmalade
A popular beginners' climb. Start five metres left of Running Crack below a short, wide corner crack.
FA: John Price & Peter Aitchison, 1967 | 11 | 44m, 2 | |||||
| 7 |
No Holds Barred
Takes a steeper and harder line right of A Little Dab'll Do Ya. Start at the tree and climb straight up past a crack and right to a bolt; move left and up to the sling belay below Dangermouse. FA: Keith Bell & Paul Edwards, 1997 | 22 | 20m, 1 | |||||
| 8 |
★ A Little Dab'll Do Ya
Start three metres right of Integral Crack. Up past incipient cracks to a nest of protection just right of Integral (shared with The Naked Chef), then up to a bolt. Slab up to the break and traverse right along it. Belay below Dangermouse. FA: John Smart & Gordon Brysland, 1982 | 21 | 23m, 1 | |||||
| 9 |
★★ Dangermouse
Sharp arete left of the top pitch of Marmalade with four or five bolts. Rap station at the top. FA: Mike Peck & Craig Kentwell, 1987 FFA: Unknown banana benders, 1989 | 23 | 15m | |||||
| 10 |
★ The Naked Chef
A derivative route cooked up by Jamie and Oliver that combines a direct start to A Little Dab'll Do Ya with a continuation up the headwall to the right of Integral (six bolts plus gear). Start 2m right of Integral. Up past a bolt to join ALDDY at the gear placements right of Integral. Follow ALDDY past another bolt and up the slab above. Follow the line of least resistance and most gear to the right and then back left to the first bolt on the headwall. Up past three more bolts. First ascent done with supplementary gear in Integral to make it to the headwall - another bolt now removes the need for this. The headwall can also be climbed independently by starting from the base of Dangermouse and traversing left to the line of bolts. FA: Oliver Story & Jamie Valdivia, 2011 | 23 | 45m, 7 | |||||
| 11 |
★★★ Integral Crack
One of the absolute classics. Considered by many to be the best line at Booroomba, noting that much of the climbing is actually face climbing rather than pure crack. Excellent natural protection. Start eight metres left of Marmalade at the slabby crack. Take lots of wires and some medium sized cams to belay. There is a rap station off to the right, above Dangermouse. FA: Peter Cocker & Peter Aitchison, 1969 | 20 | 48m | |||||
| 12 |
★★ No Beans for Bonzo
Originally un-bolted, which caused some controversy when the climb was retroed! An unlikely line up the sustained wall three metres left of Integral Crack. Straight up the wall following the line of least resistance. Originally protected using Integral Crack, it now goes on the bolts - with a couple of finger cams adding extra protection. FA: John Smart, Gordon Brysland & Andrew Collins, 1981 | 22 | 45m, 6 | |||||
| 13 |
★★★ Equanimity
A fine addition between No Beans and Roy's Crack. Sustained desperation. Bring your best rubber and lots of draws. There is an anchor station at the top. Double ropes are required for rap. FA: Jamie Valdivia, 2011 | 25 | 50m, 16 | |||||
| 14 |
★ Roy's Crack
When climbers stare up at this crack/trench route they invariably mutter "old school" and move right along. It is in fact a pretty good romp and you will use the full bag of climbing tricks. Despite the good climbing, it is not suitable for learning to place protection, as it can be a bit tricky. Start: left of Integral and Equanimity. FA: Tony Wood & Roy Hyndman (alt), 1966 | 14 | 50m | |||||
 |
||||||||
| Route | Grade | Style | Selected ascents | |||||
| 15 |
★★ Ruffles
Good sustained climbing with a reachy crux. Start at the thin crack two metres left of Roy's Crack. Straight up to the overlap, pull through into the crack and traverse right and up to the first bolt. Hard moves past this and the second bolt on enhanced holds, then up past two more bolts. Finish as for Moral Turpitude up the corner to the left, or up and right to the 'Equanimity' anchor. FA: Tony Barten, Mike Peck & John Carlson, 1986 | 24 | 35m, 4 | |||||
| 16 |
★★★ Moral Turpitude
A bold undertaking that was one of the first of the bolted routes at Booroomba. The placing of bolts caused some significant controversy at the time. Start as for Ruffles at the thin crack.
FA: John Smart, 1979 | 23 R | 45m, 2, 2 | |||||
| 17 |
★★ Don't You Know I'm Loco
Start just inside the entrance to Square Gully on the right-hand side. Up the vertical face for five metres. A hard move to pull over onto the slab, up the slab then vertical wall with sloping ramp. A tricky move to exit the face onto the top of the slab above. Head left up the slab to finish at the same anchor as African Walking Tree. 30m rap to ground. FA: Jamie Valdivia, 2010 | 24 | 35m, 10 | |||||
| 18 |
★★★ African Walking Tree
An absolute classic and possibly the best at the grade at Booroomba. A steep start up the right wall of Square Gully, a few metres left of 'Don't You Know I'm Loco'. Climb the wall past two bolts (crux) and onto the slab. Follow the ramp and keep moving left into a corner system. Up to a double bolt belay. FA: Mike Law-Smith & Richard Watts, 1983 | 21 | 30m, 2 | |||||
| 19 |
In Daze of Old
Takes a thin corner system high on the right wall of Square Gully. Start opposite Modern Times. Teeter across the slab to a series of flakes and a corner. Follow this, trending left towards the top. FA: Mike Law-Smith & Richard Watts, 1983 | 20 | 20m | |||||
|
The layback to the right of Big Flake, with a bolt up above a small boulder roof problem, remains unclimbed. | ||||||||
1.5.2. Peter Pan Area 26 routes in Cliff
- Summary:
-
Per lo più Arrampicata trad
Lat / Long: -35.556907, 148.989399
- Modern Times - 30m. Serves Square Gully through to Animal Magnetism
- Jack's Crack - 30m. Serves Jack's Crack through to 'Lazaro's Staircase', with a short down-scramble
descrizione
The small buttress between Square Gully and Jacks Crack
avvicinamento
*Warning - The tracks marked in the ACT guide have changed following the bushfires.
From the top campsite, follow the track left (west). The track splits on a few occasions but trend right, keeping the high point on your right and follow the track down a wide gully with obvious water washouts. Chossy boulders will be close on your right. The track will wrap back around the cliff line with 'Integral Crack' giving it away that you're on the right path.
From here, continue along the base of the cliff for 30m or so until a large, dark gully cuts the cliff. This is Square Gully
note per la calata
If you don't want to walk off, there are rap stations at the top of the following climbs:
 |
||||||||
| Route | Grade | Style | Selected ascents | |||||
|---|---|---|---|---|---|---|---|---|
| 1 |
★★ Square Gully
A 'horrible subterranean grovel suitable only for troglodytes and masochists'. Scramble up the bed of the gully until confronted by a chimney.
FA: Gordon Horrocks, Tony Wood & A Wadsley, 1967 | 8 | 50m, 3 | |||||
| 2 |
Gentlemen of Nerve
Quite good, complete with overhead protection and escape jugs. This is the ramp/corner at the extreme right-hand end of the left wall. FA: John Lattanzio & Greg Pritchard, 1983 | 18 | 10m | |||||
| 3 |
Cruel, Cruel Love
Quite good if you like loose blocks and slapstick humour. Start at the corner two metres left of Gentlemen of Nerve. Up the corner then right through the blocky overhang to the top. FA: Mark Colyvan & Tim Chapman, 1983 | 20 | 12m | |||||
| 4 |
★ Modern Times
Nice wall climbing. Start one metre left of Cruel, Cruel Love. Up the wall past four bolts to the left hand end of the roof, then step left around the arete and make some easier moves up to the top. FA: Mark Colyvan & Tim Chapman, 1983 | 21 | 15m, 4 | |||||
| 5 |
★★ Modern Times direct finish
Up wall past four bolts as for Modern Times to overlap / roof. Clip a bolt on the lip then blast up the headwall on jugs. Double rings to belay and rap. FA: Damian Javanovic, 2010 | 21 | 15m, 5 | |||||
| 6 |
Hold your tongue
Start as for Modern Times, at the edge of the boulder above the belay. Clip the first bolt on Modern Times. Step left past a second bolt, then up the vague open-book corner past some gear. Up the blunt arete past another bolt then more easily to the top. FA: Oliver Story & Damian Javanovic, 2010 | 21 | 15m, 3 | |||||
| 7 |
★ Tender Loving Care
Start at the dark hole at the edge of the ledge halfway up Square Gully. Crank out left along the jugs and slip, slide and heel hook up the crack. FA: Mike Law-Smith & Richard Watts, 1983 | 22 | 10m | |||||
| 8 |
Jack of Diamonds
A bit loose and poorly protected. Start below the small corner midway along the left wall of Square Gully. Up the thin corner to an easy crack on the front of the buttress. Follow this to a big ledge, then scramble off. FA: Ray Lassman & John Smart, 1977 | 21 | 35m | |||||
| 9 |
★★ A Wedding and a Baby in February
Start just inside the entrance to Square Gully on the left (North) side. Up the very-open book corner past 4 bolts, staying out of the darker rock of Jack of Diamonds. Pull over onto easier ground and up right to belay as for Peter Pan. Gear required above the fourth bolt. 30m rap into gully from a flat-topped boulder near the head of the gully. FA: Jamie Valdivia, 2010 | 21 | 35m, 4 | |||||
 |
||||||||
| Route | Grade | Style | Selected ascents | |||||
| 10 |
★★ Peter Pan
A good climb on excellent rock. The moves from the top of the block are delicate and poorly protected, hence "Peter's Pan(ic)". Start left of Square Gully at a wide, rounded crack.
FA: Peter Cocker & Peter Sands, 1966 | 15 | 48m, 2 | |||||
| 11 |
★ Peter Pan Variant Start
Start 10 metres left as for Rise and Fall, but take the right-hand crack. FA: Peter Cocker & Peter Sands, 1966 | 11 | 15m | |||||
| 12 |
The Bra Strap
A "worthless and contrived girdle which follows the line of least resistance off the ground". Starts up Peter Pan and traverses the South Buttress from right to left finishing up Matrix. Apparently ties a lot of good stuff together. FA: Bob Watt & John Hoskins, 1970 | 14 | 190m | |||||
| 13 |
Razor Sharp
A reachy little boulder problem on sharp holds. Start four metres left of and down from Peter Pan. Boulder up to and past the bolt to a thin crack. Up this and cruise to the top via Peter Pan or Confessions of a Stripper. FA: Mike Law-Smith, 1982 | 24 | 10m, 1 | |||||
| 14 |
Confessions of a Stripper
Nice moves but contrived. Start from the first belay of Peter Pan under a faint corner and a bolt. Up to the bolt, make a move right, then straight up to a horizontal break. Straight up the steep slab from here (keep out of Peter Pan!), stopping once more to place some protection. A good alternative is to move left into Purple Haze at the break. FA: Mike Law-Smith, 1982 | 21 | 30m, 1 | |||||
| 15 |
★ Confessions of a Stripper/Purple Haze combo
See description above. | 21 | 30m | |||||
| 16 |
Rise and Fall
The sad result of an ambitious but thwarted attempt on the vertical wall above the ledge, giving Booroomba's second climb. Start 10 metres left of Peter Pan, below twin cracks with some leaning blocks at the base.
FA: Jack O'Halloran & Peter Aitchison, 1966 | 7 | 30m, 2 | |||||
| 17 |
★★ Purple Haze
Only a couple of hard moves, but they make the climb worthwhile. Gary Scott did the first section in 1977 but avoided the crux by traversing into Peter Pan along the horizontal break. Start midway along Rise and Fall where a small odd-shaped pinnacle allows access right onto the arete. Step off the pinnacle onto jugs and move right around the arete into a dyke-crack system. Up this and the wall above to the cracks at the top of Peter Pan. FA: Peter Mills & Mick Lithgow, 1978 | 19 | 40m | |||||
 |
||||||||
| Route | Grade | Style | Selected ascents | |||||
| 18 |
★★ Alligator Wine
Well protected and reasonably steep. Start just right of the big block and small spike at the top of Rise and Fall. Climb up the wall (without using the spike) past two bolts. Up the ramp to a third bolt, then move left slightly and up to some runners. Continue up the steep wall on good holds past another bolt, pull onto the slab and wander up to a tree belay. FA: Mike Peck & Bill Begg, 1986 | 22 | 25m, 4 | |||||
|
The following four climbs are on the broken wall and blocks below 'Rise and Fall'. | ||||||||
| 20 |
Claim to Fame
Believed to have been done in the dark ages, but no one wrote it up. Start left of Rise and Fall at a poxy looking wall below and slightly right of a bush. Climb the wall, then the flake just right of the bush. Belay at the Purple Haze pinnacle. FA: Geoff Kennett & Dak Coutts, 1982 | 13 | 10m | |||||
| 21 |
Love Action
Looks gross. Start at the off-width left of Rise and Fall. Up this and the shallow groove above the small roof. FA: Mike Law-Smith, 1983 | 24 | 10m | |||||
| 22 |
Nirvana
"Just another classic" - but no stars! Start three metres left of Love Action. Up the wall to a bolt, then layback up the arete. FA: Mike Law-Smith & Richard Watts, 1983 | 23 | 10m, 1 | |||||
| 23 |
He'Il Never Learn
The poxy crack and chimney two metres left of Nirvana. FA: Mike Law-Smith, 1983 | 16 | 10m | |||||
| 24 |
★ Static Cling
Tackles the steep orange wall starting left of the finish of 'Rise and Fall' (and 10m left of its start). Up past four bolts (crux at second) then generally straight up to an easier finish past some good placements. FA: Simon Carter, 1990 | 26 | 30m, 4 | |||||
| 25 |
Earthbound Misfit
Another good steep wall. Start five metres left of Static Cling, part-way up Jack's Crack. Place a side runner. Climb up past a bolt to a ledge and up to another bolt, crank past this to a second ledge. Finish up a short corner with a third bolt. FA: Gordon Poultney & Mike Peck, 1988 FFA: Gordon "Goldfinger" Poultney, 1988 | 23 | 25m, 3 | |||||
| 26 |
★ Surface to Air
Worryingly loose. Marked start halfway up Jack's Crack. Follow the ramps up and right, eventually passing a bolt on Static Cling, then traverse back left to a ledge and step right past a balanced flake. Stop worrying, then go straight to the top. FA: Peter Mills & Phil Cullen, 1978 | 20 | 25m, 1 | |||||
| 27 |
Animal Magnetism
So named because of Crushed's penchant for kangaroos (and vice versa). The obvious line left of Surface to Air; protection is dubious in places. Start as for Surface to Air. Climb Jack's Crack for a few moves until able to step back right into the line. Up this, with hard moves at the start, to a thin crack below a sloping ledge and onto the final ramp. FA: Mike Law-Smith & Karl Seeuwen, 1982 | 22 | 25m | |||||
1.5.3. Possum area 41 routes in Cliff
- Summary:
-
Per lo più Arrampicata trad
Lat / Long: -35.556660, 148.989876
- Jack's Crack - 30m. Serves Jack's Crack through to 'Lazaro's Staircase', with a short down-scramble
- Cold Cuts - 15m. Serves several short climbs in the vicinity.
- Vomit - 30m. Serves Gutz through to 'Feats Don't Fail Me Now'.
descrizione
The South Buttress is shorter than some of the other areas at Booroomba, but packs a lot of punch nonetheless with a number of classic climbs. It rivals the North Buttress for popularity.
avvicinamento
*Warning - The tracks marked in the ACT guide have changed following the bushfires.
From the top campsite, follow the track left (west). The track splits on a few occasions but trend right, keeping the high point on your right and follow the track down a wide gully with obvious water washouts. Chossy boulders will be close on your right. The track will wrap back around the cliff line with 'Integral Crack' giving it away that you're on the right path.
Follow the cliff-line around from here for another 50 meters or so to reach this sector. The obvious small needle on your left is Aitchison's Needle, and makes for a good landmark
note per la calata
If you don't want to walk off, there are rap stations at the top of the following climbs:
storia
This area contains Booroomba's first line, Aitchison's Needle
| Route | Grade | Style | Selected ascents | |||||
|---|---|---|---|---|---|---|---|---|
| 1 |
Jack's Crack
This is the easy angled, slanting crack 15 metres left of Rise and Fall. Scramble up a tree to start, walk up to another tree then up the crack. FA: Jack O'Halloran & Peter Aitchison, 1966 | 9 | 30m | |||||
| 2 |
Little Jack's
Start 10 metres below and just to the left of Jack's Crack. A pathetic rising traverse left across a slab, then up a short corner. Scramble to the top as for the second pitch of Overhang Corner. FA: Unknown | 7 | 30m | |||||
| 3 |
Blood Lust
Start 10 metres right of Overhang Corner. Climb the crack to a good ledge. Move left and up the crack for four metres, through the bushes to a large block and up to a tree to finish. FA: Simon Parker, Mike Preece & Tony McGarn, 1974 | 16 | 26m | |||||
| 4 |
Flutterballs
Originally a worthless aid climb called Rurp Crack, now a 'worthless free climb'. It was freed by John Smart with a bridge move against the tree and graded 21 but on the second ascent it was found to be 24 without the tree. Start at the thin crack three metres left of Blood Lust. Extreme start and hard moves to overcome the bulge at the top. FA: Gary Scott, 1975 FFA: John Smart, 1976 | 24 | 20m | |||||
| 5 |
★ Positrons tor Everyone
Another obscure route. Start at the thin corner eight metres right of Overhang Corner. Up the thin corner and over the blocks at the top. FA: Simon Parker & Gary Scott, 1977 | 18 | 12m | |||||
  |
||||||||
| Route | Grade | Style | Selected ascents | |||||
| 6 |
★ Overhang Corner
The first pitch is quite good, but the second is rubbish. Luckily you can just do P1 and rap down from the chain at the top of Cold Cuts. Start (crux) in the corner ten metres right of Aitchison's Needle.
FA: Peter Aitchison & Tony Wood, 1966 | 14 | 32m, 2 | |||||
| 7 |
★ Indecent Exposure
Traverses left under the prominent overhang. Originally aided (16M3). Start at the top of the first pitch of Overhang Corner. Climb up to the roof. The crackless roof section is bypassed by climbing back down the vertical crack and traversing left along a weakness to about halfway, then climbing back up to the roof. A tricky end follows, then up to a belay on a bushy ledge. FA: Neil Anderson & Stas Swierczkowski, 1971 FFA: John Smart, 1978 | 22 | 25m | |||||
| 8 |
★★ Indecent Exposure Direct Start
From the ledge at the top of Overhang Corner, clmb up the orange crack and wall to the roof. Traverse left as for the original. FA: Joe Lynch & Mike Peck, 1985 | 19 | 10m | |||||
| 9 |
Winter Retreat
Start just left of Overhang Corner. Up the wall past one bolt, then more easily up the arete and a short wall to finish. FA: Adam Blizzard & Craig Kentwell, 1987 | 21 | 15m, 1 | |||||
| 10 |
Cold Cuts
The slightly overhung wall with two bolts, opposite Aitchison's Needle. A hard bouldery start if you're short. FA: Mike Peck, Adam Blizzard, Tony Barten, Craig Kentwell & Phil Georgeff, 1987 | 22 | 12m, 2 | |||||
| 11 |
Green Gully
Shorter and slightly less appealing than its Scottish namesake. Up the vegetated line about three metres left of Cold Cuts. FA: Tony Barten, Craig Kentwell, Adam Blizzard & Mike Peck, 1987 | 21 | 12m | |||||
| 12 |
Unusual Weather
Up Green Gully for a few metres, then traverse left (crux) and up. FA: Adam Blizzard & Dominic Monypenny, 1988 | 20 | 10m | |||||
| 13 |
★ Aitchison's Needle
Booroomba's first climb. The prominent pinnacle of rock standing a short distance out from the main face. It is climbed on its left edge as seen looking out from the main cliff. FA: Peter Aitchison, 1966 | 13 | 6m | |||||
| 14 |
Short Flame
A 'totally worthless addition'. The arete with a bolt on Aitchison's Needle, opposite the ordinary route; at last report, the bolt was falling out. FA: Mike Law-Smith & Richard Watts, 1983 | 22 | 7m, 1 | |||||
| 15 |
★ Carezza
A pleasant pitch of jamming spoiled by too many ledges. The left-facing corner crack with a bush at its base, eight metres left of Aitchison's Needle. Climb up this to a large ledge and continue up to the roof. Diagonally left to join Possum and move right and up to the huge ledge. Finish up Possum or Carezzissima. FA: David 'Nipper' Shirra & Bill Wilson., 1970 | 16 | 38m | |||||
| 16 |
★ Carezza Variant
An alternate finish that is less contrived than the original. From the pillar at the start of the roof pull right up the flake and mossy wall above to the Possum ledge. FA: Peter Mills, 1977 | 15 | 10m | |||||
| 17 |
★★ Carezzissima Finish
Exposed with an exciting finish. Climb up the third pitch of Possum, then traverse left for five metres past some dubious blocks and up the steepening ramp of blocks. The finish over the top is awkward and can be avoided by a short, bracing hand traverse left. FA: Bob Watt & John Hoskins, 1970 | 15 | 22m | |||||
 |
||||||||
| Route | Grade | Style | Selected ascents | |||||
| 18 |
★ Fall Guy
Jug hauling up the 'vast expanse of rock' between Carezza and Possum. Start on the ledge a few metres above the ground. A bouldery start through the overlap, then more easily up the unprotected wall to a thin crack. Up this to the Pseudopossum ledge. FA: John Stone, 1980 | 18 R | 15m | |||||
| 19 |
★★ Possum
Short pitches, but packs a lot of climbing in that space. Start below a ledge four metres left of Carezza - just right of a right-facing open corner in the alcove up and left from Aitchison's Needle.
FA: John Price, Tony Wood & Peter Aitchison, 1967 | 13 | 50m, 3 | |||||
| 20 |
★ Pseudopossum
An easier variant of Possum. Start from the first belay on Possum.
FA: Unknown | 11 | 26m, 2 | |||||
| 21 |
★★ Wallflower
A good find which takes you to the top of the first pitch of Possum. Start at the crack between Functor and Possum. Climb the crack and wall above. FA: Matt Madin, Noel Ward & Phil Georgeff, 1985 | 20 | 15m | |||||
| 22 |
★★★ Sipple
A strenuous and committing route up the headwall between Possum and Functor. In a good position and the obvious continuation to Fall Guy. From the Possum ledge, traverse left under the diagonal overlap for about five metres to where it is split by a vertical crack. Up this to the top. FA: Peter Mills & Phil Cullen, 1980 | 18 | 20m | |||||
| 23 |
★ Kilowatt
The steep orange wall with four bolts above the Possum traverse. Hard moves past the third bolt up to the fourth lead to the flake on Functor. Traverse right and finish up Sipple. Originally climbed with a rest on the top bolt. FA: Tony Barten, Mike Peck & John Carlson, 1985 FFA: Chris Plant & mate, 1986 | 24 | 30m, 4 | |||||
| 24 |
★★★ Functor
An impressive, but unfashionably wide line up the slightly overhanging wall above Possum, originally 18M3. The first pitch was originally climbed as a variant start to Possum by Dave Shirra and Bill Wilson in October 1970. Start at the corner eight metres left of Possum.
FA: Joe Friend, 1973 FFA: John Smart, 1978 | 22 | 45m, 2 | |||||
| 25 |
Teenage Wasteland
Contrived, but the well spaced bolts produce photogenic plummets. From the first bolt on Kilowatt, move up left past another bolt and up Functor for four metres (#3 Friend). At the next bolt move around left onto the headwall and traverse four metres left to another bolt. Straight up the headwall to finish up the overhanging S-shaped crack. The bolted line up the headwall is a George Fieg project. FA: Tony Barten, 1986 | 25 | 30m, 4 | |||||
/91/a9/91a98975a03facc094020182f923bf9681f349cb)  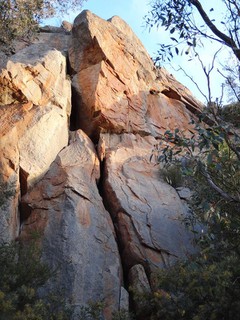  |
||||||||
| Route | Grade | Style | Selected ascents | |||||
| 26 |
Lazzaro's Staircase
The wide crack three metres left of Functor; it overhangs 20 metres up giving an exposed finish.
FA: Peter Aitchison & Lazzaro Bonazzi, 1969 | 16 | 50m, 3, 1 | |||||
| 27 |
★ Lazzaro's Staircase Direct Start
Start just left of the original. Straight up the crack to the alcove. FA: Joe Friend, 1973 | 18 | 12m | |||||
| 28 |
★★ Cakes and Ale
You could be at Arapiles for this overhung climb, which was quite controversial because of its blatantly chipped holds and four bolts. Start two metres left of Lazarro's Direct. Follow the bolts (and chalk if there's any there). Pull over the roof and up the wall to double bolt belay. FA: Tony Barten & Mike Peck, 1985 | 23 | 20m, 5 | |||||
| 29 |
★ The Valerie Plame Affair
The bolts just to the left of Cakes and Ale. Shares anchors with Cakes and Ale. FA: Justin Ryan, 2006 | 23 | 20m, 5 | |||||
| 30 |
★ Gutz Direct Start
The steep, wide crack in line with Gutz, below Hortensia. FA: John Fantini | 19 | 6m | |||||
| 31 |
The Muddle Headed Wombat
Involves little new climbing and it hasn't exactly been overwhelmed with repeats. Start as for Gutz, Hortensia etc.
FA: Matthew Larkin & Glenn Jones, 1986 | 18 | 45m, 2 | |||||
| 32 |
The Muddle Headed Wombat Direct Finish
From the large flake continue straight up the bulge with a bolt on the left. FA: Matt Madin, 1987 | 21 | 20m, 1 | |||||
| 33 |
★ Hortensia
A popular and varied climb with an awkward chimney at the top. Start on the ledge about 12 metres up and left from Lazarro's Staircase.
FA: Tony Wood & K. Sanderson, 1968 | 13 | 40m, 2 | |||||
| 34 |
★★ Gutz
The line between Hortensia and Matrix. Start as for Hortensia. Pull onto the next ledge to climb a crack and blocks to a small stance. Continue up towards the steep crack above and where it bulges step right onto the wall. Traverse right and finish up a tight chimney. FA: Nick Gallimore & Noel Beyon, 1971 | 15 | 40m | |||||
| 35 |
★ Gutz Direct Finish
Better than the original pike-out. Instead of traversing right, continue up the crack above. FA: Chris Larque, A. George & John Fantini, 1974 | 17 | 10m | |||||
| 36 |
★ Matrix
Start as for Hortensia.
FA: Peter Aitchison & Neil Anderson, 1968 | 14 | 40m, 2 | |||||
| 37 |
★★ New Presence
The right side of the arete. Start as for Matrix. Climb up the flake, left along the break to the arete, then up the wall past four bolts. Move left to the "Dreamweaver jug" at the last bolt, and up the arete to DBB. FA: Peter Weber & Mike Meyers, 1982 | 25 | 25m, 4 | |||||
| 38 |
★★ Dreamweaver
The left wall of the arete between Matrix and Vomit, now without a flake making it even more serious. Great climbing with some protection (spend time placing it). Start at the short corner directly beneath the arete. Up this past a bolt and follow the thin line left of the arete to mid-height. Move back right onto the arete and follow it to DBB. FA: John Smart & Ray Lassman, 1978 | 21 | 25m, 1 | |||||
| 39 |
★★ Beast of Burden
The white water streak between Vomit and Dreamweaver, with excellent bouldery face climbing. Either start up Vomit and move right along the ledge to the first bolt, or boulder the hard, short wall. Follow the bolts, place some gear (including #3 camalot) then straight through the overhang above. Scramble up to DBB as for Vomit. Originally a bold and direct wall with good ankle-breaking potential, Mike added bolts in 1990 making it very popular. FA: Mike Law-Smith & Guy de Lacey, 1982 | 23 | 30m, 5 | |||||
| 40 |
★★ Vomit
Good hand jamming. The steep corner crack six metres left of Matrix with a bulge to finish. There is a bolt belay up and back from the top. FA: Rick White & Ian 'Ptortoise' Paterson, 1971 | 17 | 30m | |||||
| 41 |
★★ Feats Don't Fail Me Now
Lovely moves through the roof, but watch out for the spike!! Up the thin corner just left of Vomit, through the triangular roof and up the crack above. FA: John Smart, 1978 | 20 | 25m | |||||
1.5.4. Cocker's Gully 19 routes in Sector
- Summary:
-
Per lo più Arrampicata trad
Lat / Long: -35.556826, 148.990520
descrizione
A few nice single-pitch cracks and crimpy faces. Cocker's Gully also has Booroomba's highest concentration of chimneys, most of which should be avoided by the new-age climber.
avvicinamento
From the top campsite, Cocker's Gully is best reached by following the track towards South Buttress for 100m or so, then turning right onto a footpad at a cairn before the track steepens. Follow the foodpad to a small saddle then directly down the gully. Most of the climbs are on your left.
There is also an easy route between Vomit (South Buttress) and Cocker's Gully, involving a couple of short scrambles.
note per la calata
Walk off to the left along the ridgetop. For some climbs you can rap from above 'Battle of the Bulge' or 'Scungy Wall'.
| Route | Grade | Style | Selected ascents | |||||
|---|---|---|---|---|---|---|---|---|
| 1 |
★★ Crack of Dawn
This 'well known test piece' is about 15 metres down Cocker's Gully on the right hand side of a small buttress. Up the crack to a ledge then up the short wall. FA: Ian Taylor & John Hoskins, 1972 | 8 | 15m | |||||
| 2 |
★★ Zing
Start about 25 metres down the gully from Crack of Dawn. Climb the crack on the left of the buttress, up the rubble blocks and a crack to the top. FA: Tony Wood & John Hoskins, 1972 | 9 | 24m | |||||
| 3 |
Crushed Crack
Start ten metres left of (and around the corner from) Idle Moments. Climb the finger crack, widening up higher. FA: "Crushed" | 21 | ||||||
/77/2e/772efe0ab818a16c16f22f9bf079f4c84f209f29) 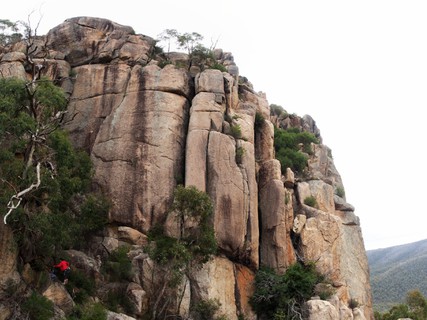 |
||||||||
| Route | Grade | Style | Selected ascents | |||||
| 4 |
High Fives
Start just left of an arete, five metres left of Idle Moments. A boulder problem up the short wall past two bolts leads to easier climbing up right to the arete, to finish up Packer Gets First Cone. The second bolt was missing a hanger at last report. FA: Simon Carter, 1987 | 24 | 15m, 2 | |||||
| 5 |
Packer Gets First Cone
Contrived climbing up the brushed wall with three bolts. Start just right of the arete and a metre left of the Idle Moments crack (hands off). A hard start, then straight up the wall/arete, finishing with a mantle. FA: Gordon Poultney, Mike Peck & Craig Kentwell, 1987 | 20 | 15m, 3 | |||||
| 6 |
★★ Idle Moments
The left-most crack in the corner alcove. Climb the crack and corner to a crux move over the summit bulge (originally a dubious tree root provided a handy jug here, but this has vanished). FA: Andrew Bowman & Dave Shirra, 1971 FFA: Joe Friend, 1973 | 17 | 20m | |||||
| 7 |
★ Last of the Mohicans
Desperate! Start up the corner (Battle of the Bulge), then move left to the central crack on the left-hand wall. Climb up to and through the bulge (bolt), then straight on up. FA: Joe Friend, 1973 FFA: Ray Lassman, 1975 | 19 | 20m, 1 | |||||
| 8 |
★★ Battle of the Bulge
The wide corner, which is either laybacked or jammed. A bolt obviates the need for super-large gear (#5 Camelot is nice) FA: Joe Friend, Lincoln Hall & Norm Booth, 1972 | 18 | 20m, 1 | |||||
| 9 |
Above the Water Line / The Witches of Eady Street
Hard slabbing. Climb the crack (Plimsoll Line) for five metres then step left onto the wall. Crimp delicately past three bolts and finish up a short crack. Name changed by Mike in 2023. FA: Mike Law-Smith, 1988 | 23 | 25m, 3 | |||||
| 10 |
★ The Plimsoll Line Direct Finish
Tacks on a little extra. Climb the crack to the left of the belay ledge. FA: Roark Muhlen, 1980 | 22 | 6m | |||||
| 11 |
★★ The Plimsoll Line
Good varied climbing that is quite delicate in places. Up the crack on the right wall, moving right to a belay ledge at the top. FA: Joe Friend, Lincoln Hall & Norm Booth, 1972 FFA: Norm Booth & Ray Lassman, 1974 | 18 | 20m | |||||
| 12 |
★ Scungy Wall
One of Booroomba's more friendly crystal crimpers. Crimp and crystal scum up the face right of The Plimsoll Line. Seven bolts to lower-off. FA: Tony Barten & Joe Lynch, 1984 | 21 | 25m, 7 | |||||
| 13 |
★ Channel Chimney
Chimney up the prominent fissure right of Scungy Wall. FA: Neil Anderson & Peter Aitchison, 1969 | 11 | 25m | |||||
| 14 |
★★ Stentor
Up the flared chimney and crack above, step right at the horizontal break and continue to the top. FA: Lincoln Hall & Peter Mills, 1975 | 16 | 40m | |||||
| 15 |
Treason
The tree may now be burnt, but it was on. The roof and crack between Stentor and Snot. Pull through the horizontal break then up the crack to the top. FA: Mike Meyers & Mike Law-Smith, 1982 | 22 | 25m | |||||
| 16 |
Snot
Apparently better than the name. The chimney a few metres right of Treason.
FA: Bill Wilson & G. Smith. P. Blackwood, 1973 | 13 | 45m, 2 | |||||
 |
||||||||
| Route | Grade | Style | Selected ascents | |||||
|
The following three climbs are on a small buttress towards the bottom of Cocker's Gully, opposite Channel Chimney. | ||||||||
| 18 |
Holidays in Hell
Thin and fingery face moves up the downhill end of the buttress, with wires and bolts. FA: Mike Law-Smith, 1994 | 25 | 10m, 2 | |||||
| 19 |
Lieback and Enjoy It
The thin, left-slanting crack. Placing protection is strenuous. FA: Mike Law-Smith, 1994 | 22 | 12m | |||||
| 20 |
★ R.U.R.S.P.B.B.W
The climb's bad but the name (Realised Ultimate Reality South Pacific Beach Bum Walrus) is worse. Up the crack to an awkward mantle, and continue up the off-width. FA: Andrew Bowman & Bill Wilson, 1974 | 16 | 12m | |||||
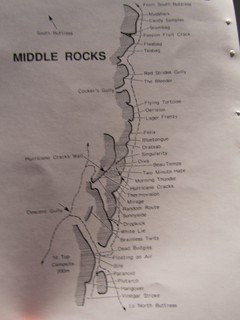
1.6. Middle Rocks 72 routes in Sector
- Summary:
-
Per lo più Arrampicata trad
Lat / Long: -35.556947, 148.991836
descrizione
There are a few classics hidden in the choss, particularly on 'Hurricane Cracks' wall. Other than that, Middle Rocks is the dirty, broken and vegetated region filling the gap between the North and South buttresses. The area has a well deserved reputation for worthless routes ranging from the mediocre to the appalling.
avvicinamento
'Hurricane Cracks' wall is best approach from the top. For other areas, the chief access is down the track to the 'North Buttress'. From the main fireplace walk up to the lookout and walk left (west) along the cliff top for about 40 metres, where the track heads back down right in a small, scrambly gully and continues to the 'North Buttress'. The first significant feature is 'Bile', a wide, jagged crack with a small roof on the right of the track. From here leave the track and double back down and left for 'Lower Tier', or up and right for 'Descent Track' climbs.
 |
1.6.1. Hurricane Cracks Wall 8 routes in Sector
- Summary:
-
Tutti Arrampicata trad
Lat / Long: -35.556886, 148.990970
descrizione
A nice vertical wall with a number of excellent climbs. The climbs start on a large sloping ledge.
avvicinamento
Best approached from the top. To get to the wall, walk left fom the lookout along the top (past the turnoff for the 'North Buttress' descent track), onto the ridge north-east of 'Cocker's Gully'. Rap in, off a broken block pinnacle or cams in a crack, or solo carefully down the loose gully on the right (as you face out) to a large sloping ledge. Beware, the rock at the top of this area is uncharacteristically broken and loose.
To approach from the bottom, climb up the first pitch of Hurricane Cracks (15), Mirage (19) or something in the vicinity. Both are worthwhile approaches to the wall from below.
 |
||||||||
| Route | Grade | Style | Selected ascents | |||||
|---|---|---|---|---|---|---|---|---|
| 1 |
★★★ Cyclone Chimney
The chimney at the left edge of the Hurricane Cracks wall. Climb the chimney to a roof at 12 metres. Exit on the left and finish up the crack in the wall above. FA: Ian Lewis, Peter Morris, Dick Curtis & Ray Lassman, 1974 | 16 | 28m | |||||
| 2 |
Consolation Prize
Worthless. Start as for 'Cyclone Chimney'. Climb the right edge of the chimney via some incipient cracks, kicking off the odd loose block as you go. FA: Ed Garnett & Richard Watts, 1983 | 16 | 15m | |||||
| 3 |
★ Sunnyside
Start on the brushed wall four metres left of 'Hurricane Cracks P2'. Up past the peg and then directly to the top. FA: Richard Watts & Mike Law-Smith, 1983 | 17 | 15m | |||||
| 4 |
★★ Hurricane Cracks P2
The flaky crack in the centre of the wall. It is awkward to start but good holds then appear. FA: Neil Anderson & Peter Aitchison, 1968 | 15 | 20m | |||||
| 5 |
★★★ Morning Thunder
Brilliant groove/crack to the right of 'Hurricane Cracks P2'. Up the crack for a few metres then step right into the thin V-alcove. Up the groove/crack above, either moving right near the top or pushing straight through. FA: Phil Cullen, Ray Lassman, Peter Mills & Peter Morris, 1979 | 20 | 25m | |||||
| 6 |
★★ Two Minute Hate
Another outstanding sustained wall. A hard start three metres right of 'Morning Thunder'. Climb up past two bolts then move right and up to a short crack. Continue up the wall moving left at the top to belay as for 'Morning Thunder'. FA: Joe Lynch & Mike Peck, 1986 | 23 | 25m, 2 | |||||
| 7 |
★★ Beau Temps
An excellent climb on a spectacular wall. Start at the right hand side of the ledge. Climb past three bolts to a horizontal break, move right and up to another bolt. Follow the thin crack (crux) through the overlap, then go for the top. FA: Richard Watts, Dave Sargent & Rob Topler, 1984 | 25 | 35m, 4 | |||||
| 8 |
★★ Diva
Great climbing and position. Start one metre right of 'Beau Temps'. Clip the first bolt on 'Beau Temps', move up and right across the flake to a bolt and stance on the arete (where there used to be a #4 Friend placement - flake now missing). Up the arete past three more bolts. FA: Tony Barten & Mike Peck, 1986 | 24 | 22m, 4 | |||||
1.6.2. Descent track 30 routes in Sector
- Summary:
-
Per lo più Arrampicata trad
Lat / Long: -35.556841, 148.992468
descrizione
These climbs are on or near the descent track from the lookout down to North Buttress.
  |
||||||||
| Route | Grade | Style | Selected ascents | |||||
|---|---|---|---|---|---|---|---|---|
| 1 |
Brainless Twits
This climb is to your left and around a corner as you are walking downhill - you'll probably walk past it. It is 40m uphill from Bile. Start at the flake at the right end of the wall. Up the desperate flake then up the wall past a bolt, during the long and epic voyage to the top. FA: Mike Law-Smith & Geoff Robertson, 1982 | 22 | 7m, 1 | |||||
| 2 |
Dead Budgies
Start eight metres right of 'Bile' at the right-hand clean strip. Place some wires from the walk down track then scramble down a few metres and boulder out the start. Continue up the wall above. FA: Mike Law-Smith, 1982 | 21 | 20m | |||||
| 3 |
Floating on Air
Quite good climbing starting at the block three metres right of 'Bile'. Onto the block and up the wall above passing a horizontal break, and keeping out of 'Bile'. FA: Mike Law-Smith, Alan Wilkie & Paul Tatersall, 1982 | 22 | 25m | |||||
| 4 |
★★★ Bile
The obvious steep, jagged crack, which often seeps green liquid. First pitch is now endowed with a thicket of teatree partway up, which will likely detract from the whole experience.
FA: David Shirra & Bill Wilson, 1970 FFA: Bill Wilson & Dick Hain, 1973 | 16 | 35m, 2 | |||||
| 5 | Project Andrew | |||||||
| 6 |
Shifty
A fun little route which finishes at the lookout. Previously top-roped by every man and his dog. Start on the big ledge 10 metres left of the top pitch of 'Bile', under a bulging wall. Up a short slab, reach up right and pull around the bulge to the flake, and up the poorly protected wall to the top. FA: Paul Daniel & Phil Georgeff, 1986 | 19 | 12m | |||||
 |
||||||||
| Route | Grade | Style | Selected ascents | |||||
|
The following two climbs are on a large boulder directly above the walk down track, about 35m down along the track from 'Bile'. | ||||||||
| 8 |
Paranoid
The sharp vertical crack with a small roof at half height. FA: Mike Law, 1974 | 18 | 10m | |||||
| 9 |
Plutarch
The prominent sweeping crack four metres left of Paranoid. Start left of the crack and climb to the cave. Gymnastically out then continue traversing right. FA: Joe Friend (self belay), 1973 | 18 | 20m | |||||
| 10 |
Hangover
The deep cleft 20 metres left of 'Bile' (and above the 'Paranoid' boulder). The only difficulty is surmounting the dirt and chockstones.
FA: J Langford & Tony Wood (alt.), 1969 | 10 | 58m, 2 | |||||
| 11 |
Hangover Direct
FA: Lincoln Hall, F. Muller & R. Carolane, 1975 | 15 | 64m, 2 | |||||
| 12 |
★ Vinegar Stroke
The obvious dogleg crack six metres left of 'Hangover'. FA: David Shirra & Andrew Bowman, 1971 | 18 | 7m | |||||
| 13 |
Recompense
More of a bushwalk than a climb. Start at a short crack 20 metres left of 'Vinegar Stroke'.
FA: John Hoskins & Tony Wood (alt.), 1969 | 9 | 70m, 4 | |||||
| 14 |
Recompense Variant Finish
A considerable improvement on the original. 4b. 30 metres - Walk left for 10 metres along a ledge. Climb the wall until able to move left into a corner then up this to a ledge. 5b. 6 metres - Up either the chimney or crack above. FA: Tony Wood & R. McIntosh, 1970 | 12 | 36m, 2 | |||||
| 15 |
Xontos
Start 15 metres left of 'Recompense' at a short corner.
FA: Peter Mills & Lincoln Hall (var.), 1975 | 17 | 60m, 3 | |||||
|
To get to the following three climbs continue past 'Plutarch' to where the track descends steeply beneath an orange wall. Turn right and scramble uphill until you reach a left facing black corner with an orange wall on the right. | ||||||||
| 17 |
★ Apparitions of Film Star
This and the following climbs can be accessed by continuing past 'Plutarch' to where the track descends steeply beneath an orange wall. Turn right and scramble uphill until you reach a left facing black corner with an orange wall on the right. Thin and technical bridging straight up the obvious corner. FA: Roark Muhlen & Matt Dunstan, 1979 | 22 | 15m | |||||
| 18 |
Domestic Harmony a.k.a. Walk Like an Egyptian
Originally done with a large cairn (pyramid) and stick to avoid the start, as well as a rest on the third bolt. Start five metres right of Apparitions of a Film Star, below the steep orange wall. The first two bolts are badly positioned. Climb past the first bolt with minor difficulty, then cruise to the top. FFA: Tony Barten & Mike Peck, 1987 FA: Gordon Poultney & David Graham, 1987 | 23 | 15m, 3 | |||||
| 19 |
Pumping Sheep / Tranquility
Originally called Tranquility, but Phil decided this wasn't his style. Start at a crack four metres left of 'Apparitions of a Film Star'. Onto the flake pinnacle then up the crack. FA: Phil Cullen & Mick Lithgow, 1979 | 20 | 12m | |||||
| 20 |
★★ The Equaliser
The obvious line on the well hidden wall about 20 metres above the top of 'Apparitions of a Film Star' (the start is marked). Up the flake-formed crack then traverse right to a short curving crack which leads to a mantle and slab to finish. FA: Peter Mills & John Smart, 1981 | 24 | 25m | |||||
|
The following climbs are reached by walking up from the 'North Buttress' track, left of 'Apparitions of a Film Star'. A slab steepens to a wall which is capped by the two twin overhangs of 'Morsehold Direct' and 'The Fourth Problem'. 'Three Problems' and 'Tree Problems' ascent the broken cliff to the right, while 'Dance Crack' climbs a vegetated buttress to the left of the main wall. The climbs are described from right to left. Frankly, you would have been better off staying on the track down to the 'North Buttress' proper... | ||||||||
| 22 |
★ Tree Problems
Discontinuous. Start from the first belay on 'Three Problems'.
FA: Ian Taylor & Tony Wood (alt.), 1975 | 14 | 25m, 2 | |||||
| 23 |
Three Problems
Start 15 metres right of 'Morsehold', immediately right of a flake pinnacle.
FA: Lincoln Hall & Bill Wilson, 1973 | 14 | 45m, 2 | |||||
| 24 |
Morsehold
Climbs the slab and wall to the left-hand overhang. Start at the right-hand end of the slab at an easy, dirty corner.
FA: John Hoskins & Bob Watt, 1970 | 14 | 60m, 2 | |||||
| 25 |
★ Morsehold left crack variant
No current description available. FA: ?? | 17 | 45m | |||||
| 26 |
★★ Morsehold Direct Finish
Nicely exposed, although a little mossy. Climb through the roof to a block belay. FA: Ray Lassman & Norm Booth, 1974 | 18 | 15m | |||||
| 27 |
The Fourth Problem
Pumpy. The best way to finish 'Great Moments in Cricket'. Out under the roof (crux), 10 metres right of 'Morsehold Direct Finish', then up the corner. FA: Rick McGregor & Bryce Martin, 1977 | 22 | 15m | |||||
| 28 |
Allyoop
The crack. Descriptive buggers, these guidebook writers, eh? FA: Dave Sargent & Mike Law-Smith, 1995 | 22 | 8m | |||||
| 29 |
Germ Free Adolescents
A good position. Start from the finish of 'Morsehold'. Up the flaky orange corner, then the diagonal crack. FA: John Stone & John Carlson, 1980 FFA: Richard Watts, 1984 | 23 | 15m | |||||
| 30 |
Great Moments in Cricket
Scary! Start on the slab two metres right of 'Dance Crack', beneath the 'Morsehold Direct' roof. Up and through the overlap with trepidation, then up a thin line through a tree to the 'Morsehold Direct' roof/cave to finish up this or 'The Fourth Problem'. FA: Peter Mills & Phil Cullen, 1970 | 21 | 35m | |||||
| 31 |
★ Camel's Smegma Couloir
Well it's not that bad. Start as for 'Dance Crack' and reluctantly move onto the right face after a few moves. Cruise up and right across the easy slab, then finish up a steep jam crack. FA: Tony Barten & Joe Lynch, 1984 | 18 | 30m | |||||
| 32 |
Dance Crack
The crack six metres right of 'Roderick', just right of a wet slimy wall. Up the crack system as you will, finishing right. FA: Ray Lassman & R. McIntosh, 1971 | 13 | 25m | |||||
| 33 |
Roderick
The short, wet, hanging chimney bordering the southern end of the 'North Buttress'. FA: Graham Gorricks & Graham Still, 1969 | 9 | 25m | |||||
1.6.3. Lower Tier 34 routes in Sector
- Summary:
-
Tutti Arrampicata trad
Lat / Long: -35.556717, 148.991139
descrizione
This area stretches from part-way down the descent track through to the bottom of Cocker's Gully and the South Buttress.
avvicinamento
Take the North Buttress descent track until you reach Bile. Double back left (facing downhill) and skirt through the bush under the cliff. The first major feature is the corner at the start of Random Route. Climbs at the southern end can be reached down Cockers Gully, or via the South Buttress by scrambling down and around from Cakes and Ale.
| Route | Grade | Style | Selected ascents | |||||
|---|---|---|---|---|---|---|---|---|
|
The following climbs are down and back left (facing down the track) from 'Bile'. The first major feature is the corner at the start of 'Random Route'. Climbs at the southern end can be reached down 'Cockers Gully'. | ||||||||
| 2 |
White Lie
Start 10 metres left of 'Random Route' on a ledge six metres up. Climb the wall to some wire placements, then awkward moves to the bolt. Pass this with difficult, then up the short diagonal crack. FA: Richard Watts & Mike Law-Smith, 1983 | 23 | 10m, 1 | |||||
 |
||||||||
| Route | Grade | Style | Selected ascents | |||||
| 3 |
Random Route
An obvious, marked corner with a bulging right wall, when walking down left from 'Bile'. The name says it all.
FA: Neil Anderson & Peter Aitchison, 1969 | 13 | 64m, 4 | |||||
| 4 |
★ Random Route Variant
A good alternative second pitch is the steep corner crack four metres to the right. FA: Mike Todd & Tony Wood, 1969 | 14 | 12m | |||||
| 5 |
★★ Random Route Direct Finish
The direct finish! | 16 | 12m | |||||
| 6 |
Randy Route
Harder and slightly more direct. Start after pitch two of 'Random Route'.
FA: Ian Lewis & Lincoln Hall, 1974 | 17 | 32m, 2 | |||||
| 7 |
★ Dropkick
Start about four metres left of the second pitch of 'Random Route' at an obvious corner. Up the corner past a bolt and continue up to a short crack. Move left to a second bolt and up the water-streaked wall to an overhang and thread runner. Pull onto the ledge and traverse left to belay. FA: Mike Peck & Joe Lynch, 1987 | 19 | 15m, 2 | |||||
| 8 |
Dropkick Direct Finish
A steep finish which is a considerable improvement on the original. Instead of traversing left below the overhang, continue straight up past a fixed wire and two bolts. Move left and up the arete after the second bolt. FA: David Jenkins & Simon Carter, 1990 | 22 | 18m, 2 | |||||
| 9 |
★★ Mirage
A good companion route to 'Morning Thunder'. The belay shimmers 10 metres over the horizon. Start three metres right of 'Random Route' in a corner to the right of a loose column. Up the blocky corner, then more difficult moves up the wall above following the incipient cracks. Move right at the top (or harder, straight up) then wander up the slab. FA: John Smart, 1982 | 19 | 25m | |||||
| 10 |
Thermovision
Start on a bushy ledge five metres right of 'Mirage'. Up a brushed streak with two bolts; take some small wires and RPs. FA: Adam Blizzard, Mike Peck & Ken Luck, 1987 | 23 | 30m, 2 | |||||
| 11 |
★ Eavesdropper
A mediocre traverse. Start five metres left of 'Pelican Punch'.
FA: John Hoskins & Tony Wood, 1970 | 15 | 80m, 3 | |||||
| 12 |
Wes' Birthday
The thin bolted wall left of 'Pelican Punch'. Two bolts on the first wall, and two on the top wall. FA: Tallis Didcott & Wes Smith, 1990 | 22 | 30m, 4 | |||||
 |
||||||||
| Route | Grade | Style | Selected ascents | |||||
| 13 |
★★ Pelican Punch
The prominent crack line on the wall left of the first pitch of 'Hurricane Cracks'. Up the wide flake crack then a ramp to a diagonal line which takes you to a ledge on 'Hurricane Cracks'. FA: Phil Cullen, 1970 | 16 | 20m | |||||
| 14 |
★★ Hurricane Cracks
Popular, with an excellent second pitch. Start at a short slab eight metres right of 'Eavesdropper'.
FA: Peter Aitchison & Neil Anderson, 1968 | 15 | 55m, 2 | |||||
| 15 |
★ Singularity
Uninspiring and dirty in appearance, but the climbing isn't too bad. Start 12 metres to the right of 'Hurricane Cracks'.
FA: Peter Aitchison & John Price, 1968 | 16 | 52m, 2 | |||||
| 16 |
Lust in the Dust
The thin brushed wall right of 'Singularity' with four bolts. A dirty finish leads to a bolt belay on a mossy ledge. Rap off. FA: Mike Peck, 1989 | 22 | 15m, 4 | |||||
| 17 |
★★ Lichen to Love
Aptly named and a fine companion to other routes in the vicinity. Start at the lichenous pillar right of 'Singularity'. Up the pillar and flakes before moving right across the moss to a corner. Up this and more moss to a large bushy ledge. FA: Phil Cullen & Peter Mills, 1970 | 14 | ||||||
| 18 |
Dratsab
Another moss and dirt special. Start at an obvious corner crack 20 metres to the right of and below 'Singularity'. The first pitch is worthwhile.
FA: Peter Aitchison & Tony Wood, 1968 | 17 | 75m, 3 | |||||
| 19 |
Bluetongue
Very dirty. The crack three metres to the right of 'Dratsab'. Climb the crack to a ledge, up left to another crack and then leftwards up a diagonal crack. Done in two pitches. FA: Peter Mills & Lincoln Hall, 1974 | 17 | 35m | |||||
| 20 |
★ Felix
Start (marked) two metres right of 'Bluetongue' in a niche. Up the open corner, right then back left up a sloping ramp and corner to a ledge. Up the V-split cracks to finish. Done in two pitches. FA: Tony Wood & Graham Horrocks, 1967 | 15 | 34m | |||||
| 21 |
Lager Frenzy
The obvious brushed line left of 'Derision'. A hard start leads to sustained slab climbing past two bolts. Follow the brushed line left to a third bolt and up past this on flakes. Scramble up the choss to belay. FA: Mike Peck, Adam Blizzard & Craig Kentwell, 1987 | 22 | 30m, 3 | |||||
| 22 |
★ Derision
The dirty crack 30 metres right of 'Felix'. Climb the corner crack, scramble up the choss, then step right into a crack. Originally two pitches. FA: Graham Still & Tony Wood, 1967 | 15 | 38m | |||||
| 23 |
Flying Tortoise
The curving chimney eight metres right of 'Derision'.
FA: Joe Friend, 1973 | 14 | 50m, 2 | |||||
| 24 |
No Wucking Forries
More choss. The obvious chimney two metres right of 'Flying Tortoise'.
FA: Gary Scott & Simon Parker, 1975 | 15 | 45m, 2 | |||||
|
The following climbs are at the extreme right hand end of 'Middle Rocks', best reached down 'Cocker's Gully'. It is also possible to scramble down and left from 'Cakes and Ale' to 'Mudshark'. This section is described in continuing left to right order. | ||||||||
| 26 |
The Bleeder
"Horrible and harder than 17 for a human being." - Chris Larque. The obvious corner crack and chimney at the bottom of 'Cocker's Gully' (50 metres right of 'Flying Tortoise').
FA: Bryden Allen † & Ray Lassman, 1971 | 17 | 50m, 2 | |||||
| 27 |
★★ Red Strides Gully
Another poxy gully route. Start four metres right of 'The Bleeder'. Up the buttress to a platform, into the gully, then right and over the boulder. Up to a large ledge and finish up the crack on the left. FA: Tony Wood & John Hoskins, 1971 | 13 | 28m | |||||
| 28 |
★ The Lace Face
Start at the gully right of 'Red Strides Gully'. Climb the groove in the right wall. FA: Bill Wilson & C. Claridge, 1975 | 10 | 20m | |||||
| 29 |
Crack left of Tea Bag
FA: Unknown | 18 | ||||||
| 30 |
Tea Bag
Start beneath the clean line five metres left of 'Passionfruit Crack'. A bouldery start leads to a crack. Up this, through the bulge, and up the wall above. FA: John Stone & Bill Begg, 1979 | 18 | 25m | |||||
| 31 |
★★ Ratbag
Between 'Fleabag' and 'Tea Bag' with one bolt and RP placements. FA: Ed Garnett & Noel Ward, 1996 | 19 | 20m, 1 | |||||
| 32 |
★★ Fleabag
White fleapowder has cleaned up the originally friable holds and dirt - quite popular and well worthwhile. Climb the brushed wall with three bolts about three metres left of 'Passionfruit Crack'. Take some RPs and wires. FA: Dave McGregor, Mike Peck & Simon Carter, 1985 | 19 | 20m, 3 | |||||
| 33 |
Passionfruit Crack
The garbage gully 20 metres below and right of 'Red Strides Gully'. Walk up the gully with a bit of chimneying at the top for variety. FA: John Hoskins & C. Douglas, 1970 | 7 | 28m | |||||
| 34 |
Scumbag
No Bolts! The thin crack and flake just right of 'Passionfruit Crack'. Getting to the first protection is somewhat perilous. FA: Joe Lynch & Mike Peck, 1985 | 19 | 25m | |||||
| 35 |
★ Candy Samples
Technical and fingery climbing on a deceptive wall. Takes the brushed waterstreak 10 metres right of 'Scumbag'. Up the flake to a bolt. Climb past this and a couple of wire placements to a second bolt and the crux. Struggle up this into the easy groove and up to a tree belay. FA: Mike Peck & Joe Lynch (yo-yo), 1986 FFA: Steve Mayers & Scott Camps, 1986 | 25 | 25m, 2 | |||||
| 36 |
★ Mudshark
Fairly sustained with a hard finish up into the groove. Start about four metres right of 'Candy Samples' at the incipient corner. Thin moves up the slab to the flake then continue up the wall past three bolts into the easy groove. Walk up this to the top and a tree belay. FA: Tony Barten, Joe Lynch & Mike Peck, 1986 | 24 | 25m, 3 | |||||
1.7. Cave Wall 15 routes in Sector
- Summary:
-
Tutti Arrampicata trad
Lat / Long: -35.556381, 148.993522
descrizione
This section of cliff is above Middle Rocks and Hermes with a prominent shallow orange cave (hence the name). The cave is visible to your right from the lookout. With several short but interesting climbs, it is well worth a visit.
The climbs are described from right to left.
avvicinamento
As you arrive at the top campsite, turn right and find a footpad. Walk east for about 150 metres. If you're lucky you'll find a cairn and footpad on the left. Scramble down to the platform below the orange cave.
note per la calata
©
 |
||||||||
| Route | Grade | Style | Selected ascents | |||||
|---|---|---|---|---|---|---|---|---|
| 1 |
Sweet Dreams
Overhung cranking followed by a well protected face problem. Start 15 metres right of 'Jacob', on top of a pile of boulders. The first old frayed fixed RP has now disappeared, so crank through to a higher one! Continue to the hangerless bolt, solve the face problem and up to the top. FA: Mike Law-Smith & Richard Watts, 1983 | 23 | 10m, 1 | |||||
| 2 |
★ Jacob Variant
The right crack direct. FA: Mike Todd & D. Bennett, 1972 | 18 | 30m | |||||
| 3 |
★ Jacob
Start left of a prominent overhang, below a crack and roof.
FA: Joe Friend & Stas Swierczkowski, 1970 | 18 | 36m, 2 | |||||
| 4 |
★ Hot Girl Summer
Up Jacob, then onto the slab and straight up past two bolts to a reachy crux and lower-off. FA: Dave Cook & Carl Godfrey, Dic 2021 | 24 | 30m, 2 | |||||
| 5 |
★ Fagged and Shagged
No stars. Up 'Jacob' and left along the obvious high traverse line to 'Kathy'. FA: Matt Dunstan & Roark Muhlen, 1979 | 20 | 20m | |||||
| 6 |
★★ Kathy's Right
Another instant route that is harder than it looks. Up and through the overhang, and move right rather than left. FA: Mike Law-Smith, 1987 | 22 | 30m | |||||
| 7 |
★ Kathy
Steep and difficult. Start four metres left of 'Jacob' below a ledge. Up to the ledge and through a bulge into a crack. Climb the crack trending left into a vegetated section and easily past a tree to the top. FA: Joe Friend & Ross Templeton, 1973 | 19 | 32m | |||||
| 8 |
★★ Liz
Steep with an interesting finish. Start from the boulder at the right side of the cave, five metres left and below 'Kathy'.
FA: Graham Horrocks & Graham Still, 1969 | 15 | 45m, 2 | |||||
| 9 |
★★ Liz LH Variant Finish
FA: G. Evans & A. Hall (alt), 2006 | 15 | 45m, 2 | |||||
| 10 |
★ Jenni
Not bad. Ascends the right-hand edge of the cave, starting as for 'Liz'.
FA: D. Bennet & Mike Todd (alt.), 1972 | 15 | 40m, 2 | |||||
| 11 |
Liz's Left
Up 'Liz' for five metres and move left on a block to the right edge of 'Cave Wall'. Climb the leftward leaning crack to the ledge. FA: Joe Lynch & Mike Peck, 1987 | 18 | 12m | |||||
| 12 |
★★ Rat Bat Blue
Hard... It was crushed into submission. The overhanging crack on the boulder downhill from the cave, and right of the final 'Little Hermes' belay, with fingerlocks, hand jams and barndooring layaways. FA: Mike Law-Smith, 1982 | 26 | 14m | |||||
| 13 |
★★ Cave Route
A positive ape factor is a definite advantage on this spectacular climb! Start at the orange flake in the middle of 'Cave Wall'. Climb up then left past a few bolts. From here a massive one armed dyno to a bucket leads to runners (#3 camalot) and a small ledge. Move right along the lip of the roof then up passing a couple of bolts to lower-off. FA: Tony Barten, 1990 | 25 | 20m, 6 | |||||
| 14 |
Phaedrus
The overhanging diagonal crackline out of the left side of the cave, then hand traverse right to some corners which lead to the top. FA: Roark Muhlen & Peter Mills, 1980 | 23 | 25m | |||||
| 15 |
Penguin in Bondage
Start 10 metres left of the cave in a shallow, right facing corner. From the top of the pillar trend slightly right to the top. FA: Roark Muhlen & Peter Mills, 1980 | 21 | 18m | |||||
1.8. North Buttress 147 routes in Sector
- Summary:
-
Per lo più Arrampicata trad
Lat / Long: -35.555315, 148.995085
avvicinamento
Follow the track down through middle rocks. For the first few climbs, head off uphill when the main track gets close to the North Buttress.
note per la calata
For most routes it is best to walk off, however there are also various rap points - see individual sectors for details.
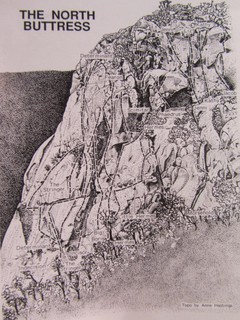 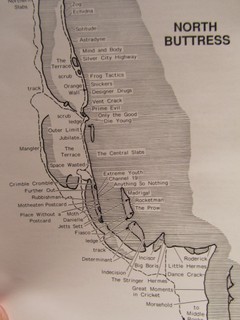 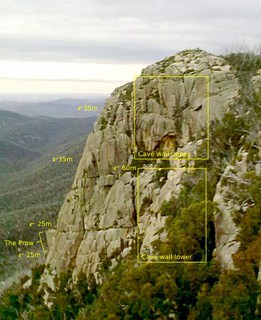 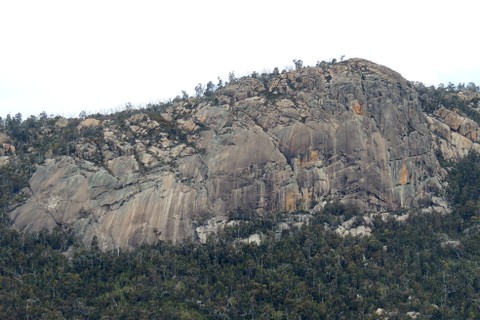 |
1.8.1. Determinant Sector 47 routes in Sector
- Summary:
-
Tutti Arrampicata trad
Lat / Long: -35.555886, 148.993657
descrizione
The first sector on the major imposing buttress seen to your right from the lookout. Home to Booroomba's classic multipitch wall climbs.
avvicinamento
From the lookout walk left (facing out) for 30m then drop down a gully that goes back right under the lookout. Follow the track until you're about level with the start of Hermes, where the track splits. A track on the contour takes you to the base of Hermes through to Determinant. For Fiasco and all routes left, continue on the left / downhill track and skirt round under the buttress.
note per la calata
For most climbs it is easiest to walk off, but a few rap anchors are handy if you want to try a few pitches on a particular tier.
There is a rap anchor at the top of Hermes (60m to ground).
There is a line of rap anchors down Yellow Brick Road and The Prow - 35m, 35m, 25m, 25m. From the top anchor it is also possible to rap 60m down and left to the base of 'Take It All' / 'Wicked Witch of the West'.
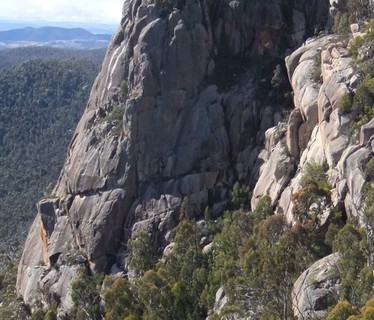 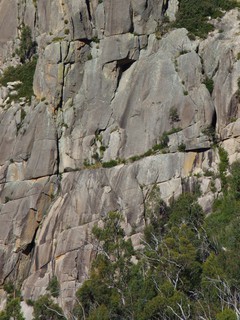 |
||||||||
| Route | Grade | Style | Selected ascents | |||||
|---|---|---|---|---|---|---|---|---|
| 1 |
★★ The Girdle Traverse
Traverses the 'North Buttress' from right to left at a fairly even standard, if you don't get lost... (see various topos). Start below the prominent chimney of 'Roderick' ('Cave wall' lower tier).
FA: Peter Aitchison & Tony Wood (Var.), 1969 | 17 | 320m, 12 | |||||
| 2 |
★★★ The Girdle Traverse: Extended Dance Mix
The second longest route in the ACT, and one of the longest in Australia. Probably just less than 500 metres, but potential over that if you get lost along the way. The description for this is basically as per "The Girdle Traverse", but add a lot more climbing to the end to make the route traverse the Northern Buttress in its entirety. Traverses the 'North Buttress' from right to left at a fairly even standard, if you don't get lost... (see various topos). Start below the prominent chimney of 'Roderick' ('Cave wall' lower tier). When the Original traverse gets to "Denethor" continue traversing left across the Northern Slabs past the second rap station of "Counterbalance" ", the second last belay of "Equilibrium", the last belay of "Hands Free", then traverse an unknown line left under an overlap to join "Sunstroke" halfway through its last pitch, continue left and finish up the last pitch of "Drunken Delight". This was done in a bunch of mostly rope stretching 50+ metre pitches, in 10 pitches in total. It could be done in many other pitch combinations so just follow your nose and belay wherever seems appropriate for you. It may be a girdle link up, BUT this makes for a stellar day out on a great wall and is the closest thing to a big wall free route that you could hope for in the ACT. Well worth a long, fun day out! FA: Duncan Brown & Ray Spencer, 23 Apr 2017 | 17 | 500m, 10 | |||||
| 3 |
Toady
Not worth the effort. Start at a wide crack uphill (right) from 'Little Hermes'.
FA: John Stone, John 'Chaz' Wood & Theo Hooy, 1979 | 15 | 40m, 2 | |||||
| 4 |
★★ Little Hermes
Popular. Start in a small recess just right of a large pillar directly below the roof pitch of 'Hermes'.
FA: Tony Wood & I. Raine, 1968 | 12 | 50m, 2 | |||||
| 5 |
★ Little Hermes Left Hand Variant
An alternative and slightly harder variation from the ledge on the second pitch. Instead of the rib, climb the leftwards slanting groove to the left. FA: Tony Wood & G. Still, 1969 | 12 | 18m | |||||
| 6 |
Herpes
Not as poxy as it sounds. Start at a flake four metres right of the final layback/roof pitch of 'Hermes'. Up the flake and make a committing move to reach the bolt. Hardish face moves past this to a thin crack leading to the top. FA: Mike Law-Smith & Karel Seeuwen, 1982 | 21 | 25m, 1 | |||||
| 7 |
Spunks in the Gym
A contrived line that detracts from 'Hermes'. Up the second pitch of 'Hermes' for three metres then move right onto the face and up past two bolts. FA: Gordon Poultney & Kieran Lawton, 1986 | 18 | 20m, 2 | |||||
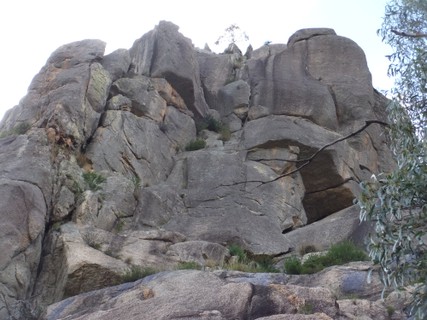 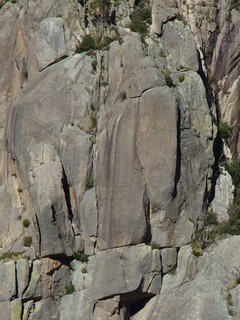 |
||||||||
| Route | Grade | Style | Selected ascents | |||||
| 8 |
★★★ Hermes
A classic. The intimidating roof section is easier than it look. Start at the left-hand side of the pillar four metres left of 'Little Hermes'. A large cam is required to safely protect both pitches (#5 is ideal, but a #4 will suffice if you're happy to wriggle in to place it).
FA: Peter Aitchison & Tony Wood (alt.), 1968 | 16 | 50m, 2 | |||||
| 9 |
★★ Hermes, Fearon combination
This is generally the way Fearon is climbed. Climb the first pitch of Hermes to the start of Fearon. | 16 | 74m, 3 | |||||
| 10 |
★ Alicia
Excellent. Start at the top belay of Hermes below a shallow corner. Climb the wall past two bolts, moving slightly right at the second. Belay at the rap station if you're coming back down, otherwise continue scrambling and belay on gear at the top. When rapping keep right and have a long arm ready to reach the belay. FA: Rob Topfer & Richard Watts, 1984 | 20 | 15m, 2 | |||||
| 11 |
★★ Scimitar
An obstinate old aid climb that repulsed a number of attempts to free it over the years. Tobin Sorensen took a big plummet off it, ripping out an old aid bolt, and it was left to local lad Crushed to finally free it. In a great position with decent climbing to follow. Start from the top belay of 'Hermes'. Traverse left then up the leftwards curving crack, passing two bolts. Belay and rap as for Alicia. A hanging belay was used on the first free ascent but is not recommended. FA: Norm Booth & N. Baxter, 1971 FFA: Mike Law-Smith & Paul Daniel, 1982 | 24 | 30m, 2 | |||||
| 12 |
★★ Thor
From the top belay of 'Hermes', traverse left (passing under 'Scimitar') then up a nice hand crack to join 'Fearon Variant Finish'. Once the climbing eases off, it is possible to head right up a ramp and blocks to the rap anchor above Alicia. FA: Chris Larque & Damien Jones, 1974 | 17 | 16m | |||||
| 13 |
★★ Devo
A circular exercise out of 'Hermes' roof to join 'Thor'. Move left from under the roof, around the lip and up a groove then back right to the belay. FA: Tobin Sorensen, 1979 | 23 | 12m | |||||
| 14 |
★ Fearon Variant Finish
Instead of climbing the chimney, exit by a crack on the right. FA: Peter Aitchison, 1968 | 16 | 18m | |||||
| 15 |
★ Fearon
Takes the open-book ramp left of the 'Hermes' roof, originally climbed with a peg for aid. Start beneath the second pitch of 'Hermes'.
FA: Peter Aitchison, 1968 | 16 | 65m, 2 | |||||
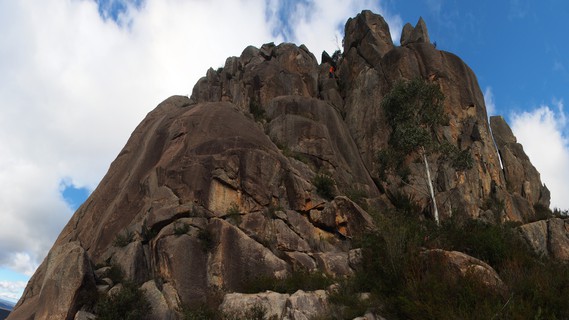 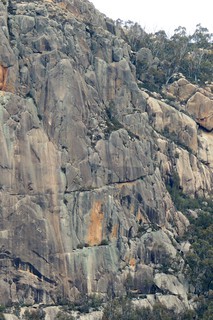 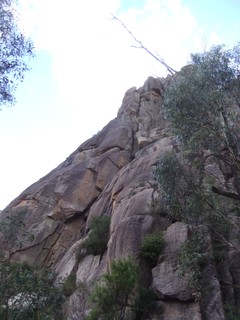 |
||||||||
| Route | Grade | Style | Selected ascents | |||||
| 16 |
★★★ Big Boris (modern version)
Avoids the wide bits - recommended. Start below blocks leaning against the face four metres left of 'Hermes'.
FA: Peter Riddy, Bryden Allen † & and modern interlopers, 1973 | 18 | 90m, 3 | |||||
| 17 |
★★ Big Boris (old-school version)
A good climb - interesting and varied. Start below blocks leaning against the face four metres left of 'Hermes'.
FA: Peter Riddy & Bryden Allen †, 1973 | 18 | 90m, 3 | |||||
| 18 |
★★★ Incisor
Outstanding climbing up a powerful line. Start below the obvious fang on the left wall of the chimney six metres left of Big Boris. Originally pitch two was split, and climbed further to the left, but the route as described was done shortly after and is better.
FA: John Fantini & Chris Larque (alt.), 1978 | 19 | 90m, 3 | |||||
| 19 |
Spatch
Start 5m left and down from the start of Incisor just right of the arete. Climb up through two horizontal breaks then up left around the arete to finish more easily up a groove to the belay for Incisor/Indecision. It is well protected with natural gear. FA: Nick Herald & Oliver Story, 2005 | 18 | 25m | |||||
| 20 |
★ The Stringer
Direct but contrived. The crux is awkward to protect; the first free attempt saw six falls taken with one protagonist knocked out! Three pegs were used for aid on the first pitch on the first ascent. Start from the first belay on 'Determinant'.
FA: Jeff Morgan & Bryden Allen † (alt.), 1972 | 20 | 90m, 4 | |||||
| 21 |
Thumper Finish
Climbs to the top of the 'Fearon' block via the crack between the left of the block and the wall. Finish as for 'Fearon' by stepping onto the face. FA: Bryden Allen † & Peter Riddy, 1973 | 19 | 30m | |||||
| 22 |
★★ Indecision
Indirect but sustained at the grade. Start at a v-cleft at the base of the cliff, shared with Fiasco. Alternatively, skip the modern addition of the first pitch and go straight to the original route, which starts below a steep ramp above the first belay on 'Determinant'.
FA: Peter Aitchison & Tony Wood (var)., 1969 FFA: Jeff Morgan & Greg Mortimer, 1972 | 18 | 56m, 3 | |||||
| 23 |
★ Indecision Variant P3
An alternative pitch 2m left of 'Indecision' P3 and right of 'The Stringer' P2. Up the shallow left-hand corner, around the lip and up the crack. FA: Phil Cullen & Lincoln Hall, 1979 | 17 | 30m | |||||
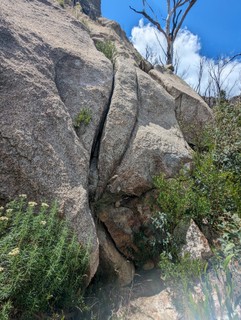 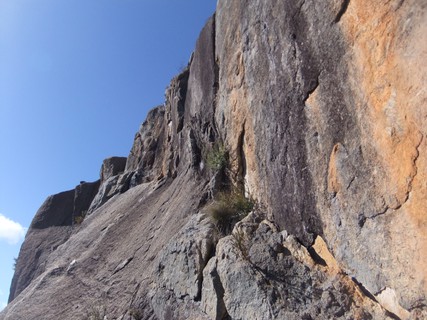 |
||||||||
| Route | Grade | Style | Selected ascents | |||||
| 24 |
★★★ Determinant (extended)
A wandering climb with a good exposed slab and a classic crack finish ('Terminant Corner'). Start where the track first touches the 'nose' of the cliff, at a short steep-looking hand crack with two smaller ones either side.
FA: Pitches 3-4 Tony Wood, Peter Aitchison 1968, Pitch 5 Peter Aitchison, C Aichison, G Hodges 1968., Pitches 1-2 Brett & Damo 2018 | 15 | 160m, 5, 1 | |||||
| 25 |
★★ Determinant (original)
A wandering climb with a good, exposed slab on the second pitch. Start 25 metres left and down from 'Hermes' at the biggest tree around. 'Terminant Corner' is now the accepted way to finish.
FA: Tony Wood & Peter Aitchison, 1968 | 15 | 140m, 6 | |||||
| 26 |
Dynamo Hum
This wall was bolted and climbed by Crushed and Dave Sargent, but they aided it (19M1) and didn't bother naming it. Start as for 'Terminant Corner'. Climb up the corner and out onto the wall. Hard moves past three bolts lead to the arete and a crack. At the ledge, go up the crack to a good finish which hand traverses left. FA: Mike Law-Smith & Dave Sargent FFA: Joe Lynch & Mike Peck, 1986 | 22 | 30m, 3 | |||||
| 27 |
★★★ Terminant Corner
The corner crack above the fourth belay of Determinant. Can be done as one pitch if you take care of rope drag.
FA: Peter Aitchison, C. Achison & G. Hodges, 1968 | 15 | 35m, 2 | |||||
| 28 |
★★ Determinant Variant Finish
An alternative final two pitches, harder and more direct than the original.
FA: Peter Aitchison & Neil Anderson, 1968 | 15 | 25m | |||||
| 29 |
Throbbing Gristle
Small, steep and perverse. The crack above the right-hand end of the 'Determinant' slab (the one used for runners for the slab). (original name changed) FA: Mike Law-Smith & John Smart, 1982 | 25 | 10m | |||||
| 30 |
Hoovering
Obscure. The crack and roof to the left of the crux on 'Danielle' (the third pitch). Can be approached up 'Indecision' P1, or by traversing right from the top of The Prow. Grunt through the overhang on sharp awkward jams. Step left and mantle up. Step back right and follow the right-leaning hand crack up the slab. At the overlap head left, then easily up fist-sized knobs to finish on the Determinant bushy ramp. FA: Lincoln Hall & Ken McMahon, 1979 | 18 | 25m | |||||
| 31 |
★ Private Wound
Start below two water streaks on a boulder above the big bushy ledge on 'Determinant'. Up the right-hand streak past some wires and two bolts (one of which replaces a fixed #0 RP from the first ascent). Move right and up to a bush and cam belay. Finish up 'Determinant'. FA: Tony Barten, Mike Peck & Gordon Poultney, 1987 | 19 | 20m, 2 | |||||
| 32 |
★ Eighteen and Anxious
A rather desperate slab; double ropes are handy. Start as for 'Private Wound'. Put a side runner in the corner, then climb the left-hand streak past a #5 RP to the first bolt. Continue up the slab with crux moves at the third bolt. From the fourth bolt head diagonally left, joining 'Yellow Brick Road' at a large flake, and up to belay. FA: Tony Barten & Mike Peck, 1987 | 24 | 20m, 4 | |||||
| 33 |
★★ Yellow Brick Road
A good climb in an exposed position. Start eight metres up the scrubby ramp of the fourth pitch of 'Determinant' at the stepped crack.
FA: Keith Nell & John Fantini, 1974 | 19 | 60m, 2, 2 | |||||
| 34 |
★★ High as Kites
Contrived, but nevertheless more interesting than any alternative. Start on the Prow, four metres right of the big block. Straight up the steep slab and face past three bolts. DBB on top of the 'Yellow Brick Road' pinnacle. Finish up 'Yellow Brick Road'. FA: Gordon Brysland & Dave McGregor, 1987 | 20 | 40m, 3 | |||||
| 35 |
★★ Jett Arete
Start from the top of the block on the third pitch of 'Determinant'. Good climbing up the cracked nose in the centre of the 'Yellow Brick Road' pillar. Finish up 'Yellow Brick Road'. FA: Gordon Brysland & Dave McGregor, 1987 | 19 | 30m | |||||
| 36 |
★★ Wicked Witch of the West
Start on the block above the third pitch of Determinant, or at DBB level with the start of the crack.
FA: 1974, Keith Neil, John Fantini, Jamie Valdivia, Oliver Story & 1974-, 2015 | 20 | 60m, 3 | |||||
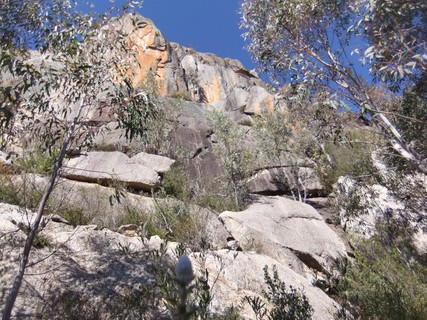 |
||||||||
| Route | Grade | Style | Selected ascents | |||||
| 37 |
★★ Fiasco
One of the best early climbs. It ascends the right side of the Prow and then follows a groove on the right-hand side of 'The Central Slabs'. Start at a corner 30 metres below and left from 'Determinant'.
FA: Peter Aitchison, Tony Wood (var.) & John Armstrong, 1968 | 18 | 150m, 6 | |||||
| 38 |
★ Fiasco Groove Variant
Originally misnamed 'Prow Direct'. Start at the base of the 'Fiasco' groove. Move up and left onto the steep slab, then follow the cleaned line diagonally left to the huge ledge below 'The Prow'. FA: Lucas Trihey & Pat Butler, 1981 | 16 | 18m | |||||
| 39 |
★★ Jetts Sett
Sustained and strenuous climbing up the left side of 'The Prow'. Start eight metres left of 'Fiasco'.
FA: Peter Aitchison & Peter Cocker (alt.), 1968 | 18 | 85m, 4 | |||||
| 40 |
★ Moth
A pleasant pitch that takes a direct line to the base of the 'Prow'. Start three metres right of 'Danielle', on the right side of the obvious flake. Easily to the top of the flake, step right to some wires then go straight up past three bolts. FA: Neil Montgomery, Adam Blizzard & Simo Carter, 1986 | 19 | 22m, 3 | |||||
| 41 |
★★ Moth... Yellow Brick Road Connection
This is a popular combination of routes that offers sustained climbing up 'The Prow'. From 'Moth' (or 'Place Without a Postcard') continue up 'Madrigal', followed by 'High at Kites' or 'Jett Arete' and finish up the second pitch of 'Yellow Brick Road'. FA: Unknown | 20 | 120m | |||||
| 42 |
★ Danielle
Indirect. Scramble up to a large ledge below a prominent triangular flake to the left of 'Jetts Sett'.
FA: Keith Bell & Ray Lassman (alt.), 1974 | 19 | 95m, 3 | |||||
| 43 |
Place Without a Postcard
A nice cracky start with a sustained slab finish. Start below the left edge of a prominent triangular flake, at a diagonal crack. Up the flake, then left and up the brushed slab past two bolts to DBB on the ledge. FA: Gordon Poultney, Mike Peck & Sean Sullivan, 1987 | 20 | 22m, 2 | |||||
| 44 |
Moth Eaten Postcard
Start as for 'Rubbishman. Up this for four metres then up the ramp to a short corner. Step right and up to a bolt. Continue up the slab past another bolt to a ledge. FA: Mike Peck & Craig Kentwell, 1987 | 21 | 20m, 2 | |||||
| 45 |
Open project
Start as for Rocketman up the thin crack. Climb diagonally up and right across the face, passing a bolt. Finish up the flake/crack on the upper face. | 25m, 1 | ||||||
| 46 |
★★ Rocketman
A true 'Prow Direct'! Start at the prominent orange flake crack in the centre of the 'Prow'. Up, then diagonally left to a balancy stance. Up the curved wall above past two bolts. FA: Roark Muhlen & Adrian Wing, 1980 | 24 | 25m, 2 | |||||
| 47 |
★★★ Madrigal
A sustained and exhilarating pitch up the left side of the 'Prow'. Start at the tree two metres right of the third pitch of 'Jetts Sett'. Up the steep wall to a sentry box. Exit left and follow the crack spiralling leftwards to finish on the side of the 'Prow'. FA: Chris Larque, Nick Clark & John Stone, 1978 | 19 | 25m | |||||
1.8.2. Central Slabs 36 routes in Sector
- Summary:
-
Tutti Arrampicata trad
Lat / Long: -35.555510, 148.994107
There is a rap line starting from the top of the headwall of Nothing Left
(a) 50-60 metres to Nothing Left belay at base of headwall
(b) 50 metres to first belay of Closer In/Extreme Youth/Channel 19
(c) 50m to ground
There is a rap point at the start of the last pitch of Jubilate / 'Bananas in Pyjamas' - 50m to ground
There is a rap line down Smash Palace - 50m to the half-way ledge below the orange wall of 'Smash Palace', then 35m to the start of the route, from where you can scramble down (or 45m to ground).
descrizione
Multi-pitch slab climbing is the main attraction here, with some routes adding on a finish up the steep headwall.
avvicinamento
Initially as for Determinant Sector - from the lookout, walk 50m left (looking out) to the top of a descent gully. Follow this back right under the lookout and through Middle Rocks to the base of Determinant Sector.
Continue on about 40m to a cairn and track to the right. This skirts along below a 10m high slab below the central slabs proper, then up for 10m or so to reach the large ledge where all the routes start. You arrive at the wall near the start of Megajules and Nothing Left. 15 min walk from the lookout.
note per la calata
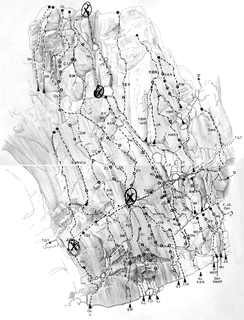 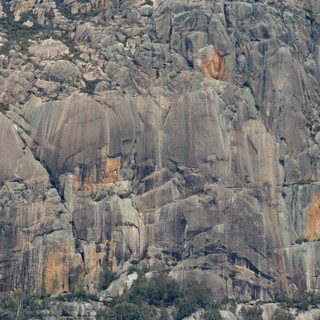 |
||||||||
| Route | Grade | Style | Selected ascents | |||||
|---|---|---|---|---|---|---|---|---|
| 1 |
★ Rubbishman
A reasonable slab route wandering up a weakness on the right side of 'The Central Slabs'. Begin at the prominent leftwards diagonal a few metres left of the 'Place Without a Postcard' flake.
FA: Peter Morris, Peter Mills & Nick Clark, 1979 | 19 | 75m, 2 | |||||
| 2 |
★★★ Rubbishman/Outer Limit combination
Continues on with the third pitch of "Outer Limit" | 19 | 180m, 6 | |||||
| 3 |
★★ Anything So Nothing
Contrived in places and somewhat overtaken by 'Nothing Left', nevertheless a great climb wandering around the water streaks to the left of the 'Prow'. Start 6 metres left of Rubbishman below an easy, scoopy slab.
FA: Geoff Hughes (#1 & 2), 1982 | 23 | 110m, 4, 1 | |||||
| 4 |
★★★ Nothing Left
Excellent mostly-bolted crimping and slabbing blasting directly up the water streak, topped off with a sporty top pitch. Take wires and small cams (up to 2.5).
FA: Matt Madin, Dave McGregor (alt; 1 & 2), 1996 | 23 | 140m, 3, 6 | |||||
| 5 |
★★ Take It All
Pity it isn't longer. Stolen from Mike Peck. Belay at the comfy ledge and double bolts on Nothing Left P2. The climbing starts on the vertical wall to the right. Interesting knobs and layaways up the wall past about seven bolts. Step right around the arete and desperately up the slab past two more bolts. A rap anchor here lets you lower off and do another route; otherwise head right and continue easily to top. FA: Ken Luck (second anonymous & alias Matt Montgomery), 1982 | 23 | 60m, 10 | |||||
| 6 |
★★★ Chanel 19
Another extreme and superb climb. Start at the incipient crack on the steep wall approximately 10 metres left of 'Rubbishman'. Up the crack to a tiny ledge, then slightly right through a slippery bowl (look closely for RP slots). Continue up the wall as for 'Rubbishman', mantle, reachy bolt, then move left around the arete. Trend leftwards up the RP protected slab to double bolt belay as for 'Closer In' P1. Three sets of RPs isn’t overkill. FA: Roark Muhlen & Rob Topfer, 1982 | 23 | 50m, 1 | |||||
| 7 |
★★★ Extreme Youth
A very good multi-pitch slab. Pull on the first bolt to drop two grades. Start at a short ramp one metre left of 'Chanel 19'. The route has more, and better, bolts than in 1982 (thanks Mike!).
FA: Mike Law-Smith & John Smart, 1982 | 24 | 140m, 4, 8 | |||||
| 8 |
★★ Further Out
Sustained and poorly protected climbing when done. "Closer In has destroyed Further Out as a sustained and poorly protected climb, putting four bolts in the crux section." - Keith Bell. Start from the ledge approximately 40 metres left of 'Place Without a Postcard', where a pillar leans against the face.
FA: Bryden Allen † (19M0, 1972 FFA: Richard Curtis & Chris Larque (alt.), 1974 | 19 | 60m, 2, 4 | |||||
| 9 |
★★ Closer In
A popular four pitch route on the Central Slab. The first two pitches make an excellent moderate grade slab route - finish up Outer Limit, Rooty Hill or Dry Route, or bail left up the gully. Look for the bolts above a pillar, although the original set has been slightly pruned.
FA: Mike Law-Smith, Steve Chey & Dave Sargent, 1994 | 22 | 150m, 4, 7 | |||||
| 10 |
★ Crimble Cromble
Another good climb on 'The Central Slabs'. Start at the pillar as for 'Closer In'.
FA: Rick McGregor & Graeme Roxborough, 1977 | 20 | 98m, 3, 1 | |||||
| 11 |
★★ Mega-Jules
An excellent direct climb up the slabs and headwall. Start left of the pillar of 'Closer In' and just right of 'Space Wasted', directly below bolts in blankness. The third pitch could now be one of the best at Booroomba.
FA: Jamie Valdivia, 2016 | 24 | 140m, 3, 10 | |||||
| 12 |
★★ Space Wasted
A very good route, although some of the climb (the second and part of the third pitches) is borrowed from existing routes and there was some dispute as to the style of the first ascent. The orange corner above the slabs (the fourth pitch) is in a superb position. Start seven metres left of 'Closer In' and just left of 'Megajules'.
FFA: Joe Lynch & Peter Darby (alt.), 1984 FA: Richard Watts & Dave Sargent, 1984 | 23 | 160m, 5, 2 | |||||
| 13 |
★★★ Double Canasta
Will this sporty route re-ignite the slab-climbing craze of Booroomba's heyday? Try it yourself to find out. Start 25m left of 'Closer In'. Do some pull-ups on a nearby tree to warm up for the first-move crux.
FA: Oliver Story & Carl Godfrey, 29 Ott 2016 | 22 | 91m, 3, 10 | |||||
| 14 |
★ Jubilate
A good climb but the upper pitches are poorly protected and quite serious. It takes a line up the lower slabs right of 'Outer Limit' to finish on the left-hand side. Start 30 metres left of 'Closer In' at a short crack below a ledge.
FA: Bryden Allen †, Graeme Wurth & John Hoskins (var)., 1971 | 18 | 100m, 4, 2 | |||||
| 15 |
★★ Miles Apart
Start as for Jubilate.
FA: Oliver Story & Jamie Valdivia, 10 Dic 2017 | 21 | 100m, 2, 9 | |||||
| 16 |
★★ Outer Limit
The original route on 'The Central Slabs', a diagonal ascent from left to right. Start as for Jubilate.
FA: Peter Aitchison & Neil Anderson (var.), 1969 | 18 | 180m, 6, 3 | |||||
| 17 |
Cat Stretch
From the top of the flakes on the first pitch of 'Outer Limit' trend right to a bolt. Continue up the wall to double bolt belay on ledge as for 'Outer Limit'. It appears most of the flake holds fell off in the 2020 fires, pretty much destroying this variant pitch. FA: Adam Blizzard, David Lyons, John Stone & Mike Peck, 1990 | 18 | 35m, 2 | |||||
| 18 |
★ Jubilate - Outer Limit Combination
A number of possibilities exist for good combinations of pitches. The most obvious is the first two pitches of 'Jubilate' followed by 'Outer Limit'. FA: Unknown | 17 | 61m, 3 | |||||
| 19 |
★★★ Outer Limit - Jubilate Combination
A sustained combination at the grade up the left hand side of 'The Central Slabs'. Climb the first pitch and part of the second of 'Outer Limit' followed by the third and fourth pitches of 'Jubilate'. FA: Unknown | 18 | 110m | |||||
| 20 |
★ Jubilate Direct Start
Start at the bolt belay at the top of the first pitch of 'Outer Limit'. Takes the left-hand line of holds and scoops. Climb up carefully (a marginal 2 or 3 rock provides some protection four metres up) and onto a ramp and up the steep wall above. FA: Mike Law-Smith, 1986 | 21 | 15m | |||||
| 21 |
★ Dry Route
Quite pleasant. Starts a few metres left of the fifth pitch of 'Outer Limit'. Up the short wall to the steep orange corner which converges to an arete at the top. Straight up, moving right to a tricky mantle near the top. FA: Andrew Collins & Phil Cullen, 1980 | 17 | 25m | |||||
| 22 |
★★ Rooty Hill
A companion climb. Start at a groove a few metres left of 'Dry Route'. Up the groove to an alcove and out through the rooflet. Up the crack and wall above to the top. FA: Phil Cullen, Ray Lassman & Lincoln Hall, 1978 | 18 | 25m | |||||
| 23 |
Space Waltz
A serious direct route to the right of the top pitch of 'Jubilate'. Start at the third belay on 'Jubilate'. Move right and up to a bolt, then hard moves up to flakes. An easier but runout section then leads to the belay as for 'Jubilate' and 'Bananas in Pyjamas'. FA: Rick McGregor & Graeme Roxborough, 1977 | 21 | 45m, 1 | |||||
| 24 |
★★ Bananas in Pyjamas
Avvertimento Roccia: Fire damage A comparatively direct and well-protected route up the left side of the central slabs. Take a light rack and plenty of quickdraws. Start 20m left of Outer Limit, just left of the access rope for the Snickers Wall ledge.
FA: Jamie Valdivia, Daniel Gordon (P1-3); Jamie Valdivia & Enzo Giuarino (P4 B1); Enzo / Jamie (P4 B2), 2014 | 20 | 100m, 4, 7 | |||||
|
The next three climbs are on a group of boulders below 'The Central Slabs'. | ||||||||
| 26 |
Mangler
Start approximately below 'Further Out' at a leftwards slanting crackline.
FA: Lincoln Hall & Bill Wilson, 1973 | 14 | 40m, 2 | |||||
| 27 |
Mega Move Marvel
A worthless contrived mantle first done with a backrope. Start right of 'Fat Like Me'. Up the slab to a horizontal break, then directly up the wall above with a short slab to finish. FA: Richard Watts, 1983 | 23 | 20m | |||||
| 28 |
Fat Like Me
A technical slab problem which was soloed after top-rope inspection. A serious lead. The narrow, cleaned slab about 20 metres left of 'Mangler'. FA: Mike Law-Smith, 1982 | 22 | 15m | |||||
| 29 |
Linear Crack
The crack/trench bounding the left end of the Central Slabs. The crack is hard to get to, and not particularly worthwhile anyway. The aid used on the second pitch was freed by Roark Muhlen as part of 'Powder Finger Finish'. Climb the first pitch of 'Outer Limit' or the first and second pitches of 'Bananas in Pyjamas'.
FA: Peter Aitchison & Neil Anderson (alt.), 1969 | 22 | 94m, 4 | |||||
| 30 |
★ Powder Finger Finish
Another superb, long and hard slab route. The original first pitch climbed a flake and overlap just left of 'Outer Limit' (now claimed by Bananas in Pyjamas P2), but the route as described is much better. Start above the second bolt of 'Bananas in Pyjamas' (scramble up the bushy gully). This is 10m right and up from 'Vent Crack'.
FA: Roark Muhlen, Peter Mills & John Hartlet, 1980 | 23 | 100m, 3, 1 | |||||
| 31 |
★★ Smash Palace
One of the best routes at Booroomba, with sustained and scary climbing in a great position. Start as for 'Powder Finger Finish'.
FA: Joe Lynch & Mike Peck (Tony Barten #1), 1985 | 23 | 90m, 3, 2 | |||||
| 32 |
★★★ Only the Good Die Young
Brilliant climbing up the steep slabs and impressive headwall left of 'The Central Slabs'. Start as for 'Powder Finger Finish'.
FA: Gordon Brysland (led #1, 4), John Smart (led #2 & 3), 1982 | 22 | 100m, 4, 1 | |||||
| 33 |
Prime Evil
No bolts, no chips, no fun! A devious and run-out climb taking a line between 'Only the Good Die Young' and 'Vent Crack'. Start just right of 'Vent Crack', five metres up on a small ledge.
FA: Tony Barten, Mike Peck & Simon Carter (#1) or Adam Blizzard (#2), 1987 | 21 | 85m, 2, 1 | |||||
| 34 |
★ Vent Crack
Only the first two pitches are worth the effort. It is better to finish up Baryon. Start (marked) below the prominent crack 20 metres left of 'Outer Limit', at the right-hand end of an orange wall (Snickers Wall).
FA: Peter Aitchison & Tony Wood, 1968 | 14 | 130m, 5 | |||||
| 35 |
★ Baryon
An improvement on the middle sections of 'Vent Crack'
FA: J. Land & Peter Sands (alt.), 1975 | 15 | 80m, 4 | |||||
| 36 |
★ After the Reiving
The despoliation hadn't even started! Ascends the prominent buttress above and right from 'Vent Crack'. A nice finish to 'Vent Crack' or 'Baryon'. Start at the end of the third pitch of 'Vent Crack'. Climb the bulge up the wide, slanting crack on the right, then traverse down and right to a ledge. Pleasantly up a groove to the top. FA: Phil Cullen & Chris Larque, 1977 | 15 | 30m | |||||
| 37 |
★★ Baryon Direct Variant
Probably climbed before as obvious line, alternate, better and harder variant on broken and very loose flake on pitch 2 of Baryon. From belay for P2, delicately straight up via thin crack to join Baryon at poised blocks. Finish as for original route. | 18 | 20m | |||||
1.8.3. Snickers Wall 7 routes in Sector
- Summary:
-
Tutti Arrampicata sportiva
Lat / Long: -35.555243, 148.994490
descrizione
The vertical to overhanging section of orange rock embedded left of the Central Slabs. Single-pitch hard sport climbing is the go. There is a marked start for the old-school 'Vent Crack' at the right hand end.
avvicinamento
As for North Buttress: From the Middle Rocks lookout, walk 50m left (looking out) to the top of a descent gully. Follow this back right under the lookout and through Middle Rocks to the base of the North Buttress. Continue on 40m to a cairn and track to the right. This skirts along a slab below the Central Slabs, then up for 10m or so to a large ledge. Keep following the base of the cliff until you come to a short rope. Swing up this and round the corner to Snickers Wall. 15 minutes walk from the Middle Rocks lookout.
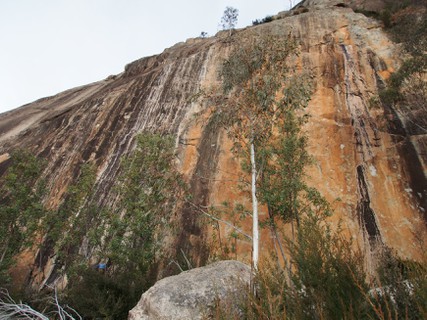 |
||||||||
| Route | Grade | Style | Selected ascents | |||||
|---|---|---|---|---|---|---|---|---|
| 1 |
★★ Boy's Brigade
A good pump. Start about 8m left of Vent Crack. Up past the first bolt then traverse right past two bolts to a flake and bolt. Continue up the overhanging wall past three more bolts (originally with the usual rest on the top bolt). Lower-off. FA: Mike Peck & Gordon Poultney, 1987 FFA: Tony Barten, 1989 | 25 | 18m, 7 | |||||
| 2 |
★★★ Truth
Start as for Boy's Brigade to the good holds on the traverse then take the water streak straight up, following the bolts, for a muscle fatiguing experience. A desperate direct start past one bolt awaits an ascent. Tracciata: Chris Warner & Jamie Valdivia FA: Jamie Valdivia, 2000 | 29 | 25m | |||||
| 3 |
★★★ Designer Drugs
A steep, direct and well protected wall. More technical and sustained than 'Snickers'. Start as for Boy's Brigade but go (mostly) straight up. Lunge up to and past the first bolt to the second. Gain a big hold out right, then back into the line. Continue up the wall past four more bolts. An awkward move brings the seventh bolt to hand, then up onto the slab. Rap as for GGO. Loss of holds in the 2020 fires has made the climbing sequence different than the original route, and probably increased the grade from its original 25. FA: Mike Peck, 1986 FFA: Tony Barten, 1989 | 25 | 22m, 7 | |||||
| 4 |
★★★ Global Gas Oven
Start three metres left of 'Designer Drugs'. Up past eight bolts. Originally the route joined 'Snickers' at the end of its traverse; the excellent direct finish was added by Chris Warner in 2013. FA: Gordon Poultney & Simon Carter (both led), 1992 | 27 | 25m, 8 | |||||
| 5 |
★★ Snickers
Start 3 metres left of GGO, at the right-hand side of the black streak. Climb past four bolts and traverse right past a fifth and optional nut, where there is a good rest. Move right a few millimetres to another bolt then up the overhanging wall past two more bolts. From the top bolt go left then up a short slab to chain. On the first ascent, a rest was used on the top bolt. FA: Mike Peck & Tony Barten, 1985 FFA: Chris Plant, 1986 | 25 | 25m, 8 | |||||
| 6 |
★★ Frog Tactics
Start five metres left of 'Snickers' just left of the black waterstreak. The crux moves (with a chipped hold) are between the first and second bolts. Continue up on good holds to chain belay. FA: Tony Barten, 1987 | 25 | 22m, 8 | |||||
| 7 |
★★ Hitler Youth
Just left of Frog Tactics. Up past six bolts to lower-off. Early crux and watch your back on the block if you fall. FA: Chris Warner | 24 | 20m, 6 | |||||
1.8.4. Echidna Slabs 14 routes in Sector
- Summary:
-
Per lo più Arrampicata trad
Lat / Long: -35.555227, 148.994914
descrizione
Nice slab routes in the mid grades, including some exciting old-school adventures and modern sport masterpieces.
avvicinamento
Walking: approach as for Snickers Wall and walk left another 50m, past the two 5 metre high flakes just separated from the wall.
Rap-in: walk north along the top track over the summit, then turn left (north-west) and wind your way down to the top of Astradyne, where there is a chain belay. Difficult to find from the top for the first time.
note per la calata
Rap point at the top of Astradyne. Rap 50m straight down to a 3-bolt anchor in a corner. Rap 30m to the top of the flake at the start of Silver City Highway, from where you can easily scramble down.
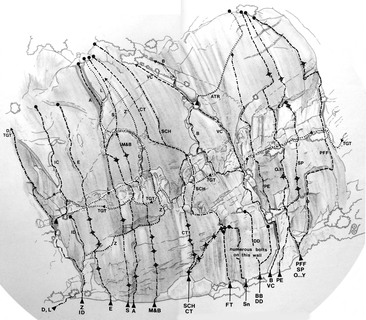 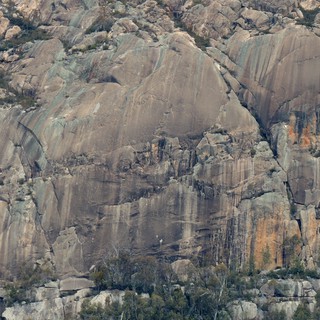 |
||||||||
| Route | Grade | Style | Selected ascents | |||||
|---|---|---|---|---|---|---|---|---|
| 1 |
★★ Silver City Highway
Follow the mineral deposits (bolts) of which there are four on the first pitch. Start on the 5-m triangular block at the left hand end of 'Snickers Wall'.
FA: Matt Madin & Dave McGregor (alt.), 1985 | 20 | 90m, 3, 4 | |||||
| 2 |
★★ Crystal Tips
A good, varied climb with a thin crux. Start as for 'Silver City Highway'.
FA: Matt Madin & Dave McGregor, 1986 | 23 | 90m, 2, 4 | |||||
| 3 |
★ Money, Marbles and Chalk
Start as for 'Silver City Highway' on the 5m high block. Lean over, clip the first bolt, then climb up and left to the second. Straight up past four more bolts to rap anchor in corner. 30m rap back to top of block. Originally traversed left at the third bolt and joined 'Mind and Body', but the direct finish is better. FA: Mike Peck, David Lyons, John Stone & Buzzard, 1990 | 20 | 35m, 6 | |||||
| 4 |
★ Mind and Body
Another good slab route. Getting to the first bolt is quite scary. Start just left of the 5-metre 'Silver City Highway' block.
FA: Richard Watts & Mike Law-Smith, 1983 | 22 | 90m, 3, 3 | |||||
| 5 |
★★ Psychosomatic
Fantastic slab climbing on small edges. Just left of Mind and Body, this route is well equipped with bolts to rap anchors. Some gear is handy at the Zog Traverse (sloping ledge). 35m lower-off - 70m rope required. It is possible to continue up Astradyne or Mind and Body, both of which are run-out with 1 bolt and minimal gear; or up Lepton pitch 4 (nice climbing with good gear). FA: Chris Warner & Chris Fitzgerald, 2010 | 20 | 35m | |||||
| 6 |
★★ Astradyne
A good direct line up the steep slabs to the right of 'Zog'. A bolt protects the crux. The second pitch was originally unprotected but a bolt was added (at the beginning of the leftwards diagonal weakness) in 1992. Start beneath a vertical dyke of finely textured rock 3m left of 'Psychosomatic'.
FA: Paul Daniel, Geoff Kennett & Tim Chapman, 1982 | 20 | 90m, 3, 1 | |||||
| 7 |
★ Solitude
Not quite as good as the other routes on this wall, and with serious fall potential on the first pitch. Start beneath the bolt five metres left of 'Astradyne'.
FA: Richard Watts (solo), 1984 | 21 R | 90m, 3, 2 | |||||
| 8 |
★★ Unacceptable In The 80s
The line of bolts just right of Echidna (sharing the first bolt).
FA: Chris Warner & Ku Barry, 2010 | 19 | 90m, 2, 8 | |||||
| 9 |
★★ Echidna
A classic slab route. Start at the shallow groove below blocks just left of 'Unacceptable In The 80s'.
FA: Richard Watts & Bob Killip, 1984 | 19 | 80m, 3, 5 | |||||
| 10 |
All at Sea
From the 3rd belay on Denethor, move past the start to the Ivory Coast crack, then follow the rising, featured scoop with good gear, to the barren slab. Straight up the steepening slab to shallow grooves and the large flake for some welcome protection. Around right or over the flake to the top. FA: John Wilson, Geoff Gardiner & Robert Douglas, 2014 | 15 | 45m | |||||
| 11 |
★★ Zog
An ascending traverse between 'Denethor' and 'Vent Crack' with some good climbing, but the second pitch is poorly protected and quite serious at the grade. Start at the left-hand end of 'The Terrace', below a crack 50 metres left of 'Vent Crack'.
FA: Tony Wood & Ian Taylor (var.), 1970 | 16 | 90m | |||||
| 12 |
★ Lepton
Some good, easy and exposed climbing along a rightwards traverse. Starts at the top of Denethor P2. To get there, either climb Denethor P1 and P2 or carefully walk 10m left of Echidna and then climb Denethor P2 (the easy-angled groove).
FA: Peter Sands & J. Land, 1973 | 14 | 92m, 5 | |||||
| 13 |
★ Immaculate Deception
danger, unprotectable climb A very bold on-sight lead. The climb has been repeated, but only after top-rope inspection. The unprotectable, snaking groove to the left of 'Zog'. Climb to the top of the flakes as for 'Zog', but then follow the thin groove straight up to join a ledge at the 'Girdle Traverse' level. FA: Roark Muhlen & Peter Mills, 1980 | 22 | 35m | |||||
| 14 |
★★ The Ivory Coast
Just beautiful. It ascends a fragile flake to the right of 'Denethor', and is a great way to finish 'The Girdle Traverse' etc. At the start of the third pitch of 'Denethor', move right for about three metres to a ledge. Climb the leftwards leaning ramp behind to the obvious flake. Up the right hand side with tender loving care, then the slab above to belay. FA: Chris Larque & Phil Cullen, 1977 | 14 | 25m | |||||
1.8.5. Northern Slabs 43 routes in Sector
- Summary:
-
Tutti Arrampicata trad
Lat / Long: -35.555011, 148.996000
descrizione
The Northern Slabs is home to Booroomba's classic easier slab routes. Many of the routes are poorly protected by sport climber standards, with the potential for a long slide if you lose your grip, but most are protected against a groundfall at least. For fullsome route descriptions, gear beta and more check out the comprehensive PDF guide listed under guidebooks.
avvicinamento
The best way to the Northern Slabs is to take the central access track and skirt all the way under the North Buttress. From the look out walk left (looking out) along the cliff line and after about 50m there will be a steep gully trending back down and to the right towards the North Buttress.
Follow the track down the gully (it's pretty clear) and underneath Determinant Buttress then Central Slabs. At any cairned junctions take the left, low road. The track moves away from the rock after the Central Slabs, rejoining it at the right-hand edge of the Northern Slabs just left of Denethor / Counterbalance.
It is also possible to walk along the top track and find your way to the rap anchor at the top of 'Melmouth, near the 'Sunstroke topout. Two raps of around 35-38m are required, one 60m rope will not reach on the double, not sure about a 70m. The first downclimb of a rope is located at 35°33'20.5"S 148°59'46.0"E (google maps), the 'Melmouth anchor is located at 35°33'19.6"S 148°59'46.9"E.
note per la calata
It's generally best to walk off along the ridge and back to the top lookout.
There is a rap anchor at the top of Melmoth. This is also accessible by walking left along a ledge from the top of Sunstroke. Two full 35m raps to ground.
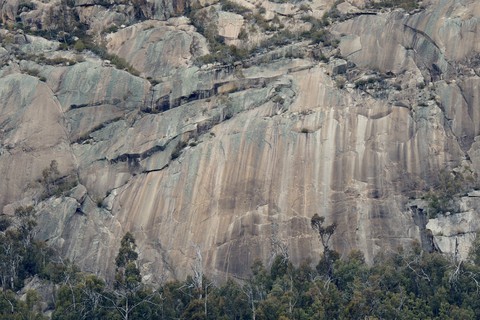 /ea/8b/ea8b2fb7490c5cca9d72de2d5378ee36d93db459) |
||||||||
| Route | Grade | Style | Selected ascents | |||||
|---|---|---|---|---|---|---|---|---|
| 1 |
★ Denethor
A good introduction to slab climbing. Climbs the slabs and grooves bordering the right-hand end of the northern slabs. Start at a short, steep black slab just left of a damp overhang where the walking track rises after skirting below 'The Terrace'.
FA: Peter Aitchison & Tony Wood (alt.), 1969 | 14 | 100m, 4 | |||||
| 2 |
In Cold Blood
Start at the left-hand edge of 'The Terrace', about 15m left of Echidna. Head left and climb a shallow right-facing corner then move slightly right (crux - unprotected) and climb a shallow left-facing corner. Trend towards, then climb, a shallow groove for a few metres. At the lichen move right to finish up 'Denethor'. Can be top-roped from Denethor. FA: Matthew Larkin & Glenn Jones, 1985 | 17 X | 35m | |||||
| 3 |
Fear of Frogs
Start at the left-hand edge of 'The Terrace', about 15m left of Echidna. Just another contrived slab. Arrang protection as for 'Peregrine' at the top of the juggy brown slab, then down-climb to the start of the white streak. (If top-roping head straight up a short vertical groove to the white streak.) Follow the white streak to a 10cm wide curving ledge at 27m (bolt as for 'Peregrine'). Continue up 'Peregrine'. FA: Matthew Larkin, Patricia Blumstein & Glenn Jones, 1985 | 17 | 45m, 1 | |||||
| 4 |
Peregrine
Start at the left-hand edge of 'The Terrace', about 15m left of Echidna.
FA: Matthew Larkin & Glenn Jones, 1985 | 18 | 70m, 2, 1 | |||||
| 5 |
★★ Counterbalance
Slab climbing that is 'a little more serious' than 'Denathor' due to the scarce (but solid) protection on the second pitch. Start as for 'Denethor' (or skip the first pitch and start at the left-hand edge of 'The Terrace', about 15m left of Echidna).
FA: Tony Wood & J. Langford, 1969 | 14 | 120m, 3 | |||||
| 6 |
★ Solantic
A rising traverse of 'The Northern Slabs' from right to left, with some pleasant slab climbing on the second and third pitches. The second pitch is scarier to follow than to lead.
FA: Peter Riddy & Peter Cocker, 1974 | 17 | 160m, 4, 2 | |||||
| 7 |
★★ Balance
Start three metres left of 'Denethor'.
FA: Bill Wilson & R. Warder, 1974 | 18 | 130m, 3, 1 | |||||
| 8 |
★ Balance Direct Start
danger Straight up the slab six metres left of the original (at marked start), to the second belay. The first ascent saw a 12 metre slide. In fact most of this portion of slab has been climbed as variant starts. Unprotected. FA: Mary Kensington & Peter Morris, 1977 | 19 | 40m | |||||
| 9 |
★ Balance Lite
Avoids the two crux moves on the first pitch of "Balance". Start up "Denethor" to avoid the first crux. Traverse left to get back on "Balance". Once beneath the bulge (second crux of "Balance"), traverse right to easier ground and then up and back left to the first belay of "Balance" (DBB). Pitch 2 and 3 as for "Balance". FFA: B Wilson & R Warner, 1974 | 15 | 130m, 3 | |||||
| 10 |
★★ Metal Fatigue
A fine direct slab. Start about 12 metres left of 'Balance' beneath two thin flakes.
FA: John Smart & Ray Lassman (alt.), 1978 | 20 | 90m, 2, 3 | |||||
| 11 |
★★ Metal Fatigue - Stele Breeze Combination
Two great pitches up 'The Northern Slabs'. Climb the first pitch of 'Metal Fatigue' and then traverse left to join the second pitch of 'Stele Breeze' at the bolt. FA: Unknown | 20 | 80m, 2, 3 | |||||
| 12 |
★★ Stele Breeze
The catch-cry "if it's got a runner it's not bold” applies to both pitches, with P1 in particular having ankle-breaking potential without the retro bolts. Start as for 'Metal Fatigue'. With Roark's agreement bolts were placed on P1 to protect against a ground fall, however these were subsequently removed.
FA: Roark Muhlen, 1976 | 20 | 100m, 3, 1 | |||||
| 13 |
Total Control
danger Up the unprotected slab 3m left of 'Stele Breeze' at lighter coloured rock where it appears a large narrow flake has fallen off. Originally onsight soloed to 'allay boredom'! May be possible to top-rope with a long sling on the top bolt of 'Stele Breeze' P1. Sustained climbing on small sharp edges up the light coloured rock for at least 15m before the angle eases, then trend left to eventually join the 'Solantic' traverse. DBB on the ledge as for Equilibrium. FA: Mike Law-Smith & John Smart (solo), 1982 | 19 X | 45m | |||||
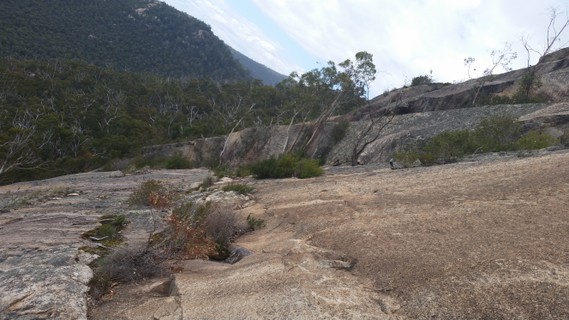 |
||||||||
| Route | Grade | Style | Selected ascents | |||||
| 14 |
★ Rock Lobster
The first five metres is the crux, and may be impossible as the critical dinner-plate-sized mantleshelf flake peeled off sometime after the 2003 fires. The first pitch starts under the black slab six metres left of 'Stele Breeze'. The second pitch is still climable and can be toproped from a trad belay mid-way between Counterbalance and Equilibrium.
FA: Roark Muhlen & Paul Daniel, 1980 | 22 X | 90m, 2 | |||||
| 15 |
Rounge Lizard
danger Just another unprotected slab route to fill in the space. Start off some big flakes about 7m left of 'Rock Lobster' and 8m right of 'Tip Stripper'. It was inspected on top-rope before the first (solo) ascent. Climb the slab above the large flake to the obvious scoops in the steep wall. Up the wall to easier ground then up, right of the lichen, to join Solantic near the belay. FA: John Smart (solo), 1982 | 23 X | 40m | |||||
| 16 |
Tip Stripper
Another gap filler, but with a bolt for a bit of variety. Up the slab then the steep wall left of the bolt (crux), over the bulge to easier ground. Can be top-roped from the Equilibrium belay. FA: Mike Law-Smith, 1982 | 22 X | 38m, 1 | |||||
| 17 |
★ Basilisk
danger Start about 6m left of 'Tip Stripper' and 7m right of 'Equilibrium Direct Start'. The line is about 4m right of a thin light brown water mark. Climb the slab to the break then up the steep wall (diabolical unprotected crux) to easier ground after a few metres. Can be top-roped from the Equilibrium belay. FA: Richard Watts (solo), 1984 | 22 X | 38m | |||||
| 18 |
★★ Equilibrium Direct Start
danger A hard and better variation, with delicate friction climbing but no protection. Start 4m right and up from the original start of Equilibrium, on the top of a large flake. Climb the shallow groove moving right to the corner (crux) (there was once a poor branch runner here, but the tree has succumbed). Thin climbing to the break, then move left to the first light brown water streak. Up this to join Equilibrium at the traverse ledge. If you're on top-rope you can continue up the slab and traverse to the belay higher up. FA: Roark Muhlen et al., 1976 | 20 X | 39m | |||||
| 19 |
★★ Equilibrium
Quality climbing and one of the more popular routes in the area. The start is marked with a faint "E" (no longer visible as of 2017) and is located approximately 40m left of Denethor. This is around 10m right of Sunstroke.
Various alternative finishes are possible from the top of P2: traverse right to join 'Counterbalance' or 'Balance'; traverse down and left to join 'Solantic'; or climb 'Grandad's Big Day Out'. Rebolted 2011. FA: Peter Aitchison & Peter Cocker, 1969 | 17 | 140m, 4, 2 | |||||
| 20 |
★ Entropy
danger An unprotected variant of the second pitch of 'Equilibrium'. There are almost no handholds and it’s an enjoyable exercise in smearing if you top-rope it from somewhere between Counterbalance and Equilibrium. Climb the brown slab directly above the belay, moving right (or left) to avoid the lichen when the slab eases off. Entropy was the result of Chris Largue not spotting the bolt when he first set off to climb Equilibrium! To pacify his whingeing seconds (in those days the belay was a single piton) he taped a sling over a rounded knob using tape from the handle of his hammer (the knob would probably hold a falling mouse). It's harder than Equilibrium and unprotected unless you have really really sticky tape. FA: Chris Larque, Damien Jones & Peter Mills, 1974 | 17 X | 40m | |||||
| 21 |
Grandad's Big Day Out
Has an entertaining and unusual move in each pitch. Start at the 2nd belay of Equilibrium.
Update (2019): the top of the flake on P2 is cracked and likely will come off with a big tug. FA: brian mattick & Peter Cunningham (alt), 2013 | 16 | 32m, 2 | |||||
| 22 |
★★ Just in Passing
Named because of the slide past the bolt on the first attempt. The first pitch is contrived, but the second is a fine direct slab climb. Start beneath a black slab midway between 'Equilibrium' and 'Sunstroke'.
FA: Paul Daniel, Mike Law-Smith, John Smart & Geoff Robertson, 1982 | 19 | 85m, 2, 1 | |||||
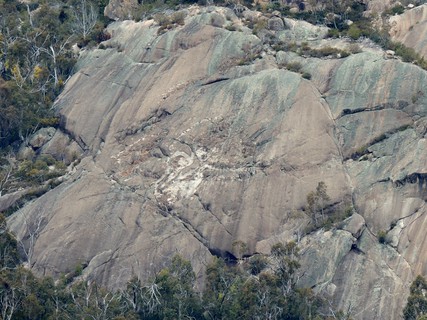  /8b/2f/8b2fef02169a8694a3f2c2c81fad76eea97b5868) |
||||||||
| Route | Grade | Style | Selected ascents | |||||
| 23 |
★★ Sunstroke
An easy, well-protected popular classic. Climbed on a searing summer's day, it was the first climb done on 'The Northern Slabs', taking the line of least resistance. Start at a slanting crack eight metres left of 'Equilibrium'.
This is often run together into two pitches (1/2, 3/4) rather than four. If you love slabs it's also possible to combine P2 and P3 by slabbing up as for Ephemeros, avoiding the short corner on P3. FA: Peter Aitchison & Ian Raine, 1968 | 9 | 120m, 4 | |||||
| 24 |
★ Sunstroke Variant P2-3
2b. 20m - From the first belay, climb the groove for six metres and traverse right to a parallel crack; climb this and the large blocks to a good stance. 3b. 25m - Move left across the slab, back to the main groove and third belay. FA: Unknown | 9 | 45m, 2 | |||||
| 25 |
The Streaker
A variation finish to Sunstroke up the slab and headwall right of the final pitch. Although reported in Thrutch number 64 (September 1974) it wasn't recorded elsewhere until 2015. As a result it’s had few ascents and is marred by too much lichen. There are old bolts to mark the way but not really usable (or needed) with modern gear. Start at the final (third) belay on Sunstroke. Start up Sunstroke then move right up the slab to below the overlap and old bolt runner. Climb the overlap (crux) and move left around the corner to the next wall and old bolt runner. Up wall to finish over right at the large block. Walk off as for Sunstroke. FA: Dick Hain & Peter Grey, 1974 | 15 | 36m | |||||
| 26 |
Sunday Stroll
Just what Booroomba needs - another route on 'The Northern Slabs'. Takes a fairly direct line between 'Sunstroke' and 'Bird of Prey'. FA: Harry "Bumperbar" Luxford & Kevin Westren, 1984 | 17 | 50m | |||||
| 27 |
★★ Bird of Prey
Exposed friction climbing at its best. Start 15m left of 'Sunstroke' on or just to the left of a flake resting against the slab.
FA: Paul Daniel, John Carlson & Mike Peck, 1979 | 17 | 60m, 2 | |||||
| 28 |
Hands Free
A balancy, exposed climb unfortunately marred by too much lichen. Start at the 2nd belay of 'Bird of Prey'. Take long slings to reduce rope drag. Move left from the belay, then up and right to the slab above the belay. Climb right below the overlap then down and around the prow and up the slab until it’s possible to pull up left onto the higher slab. Easier climbing diagonally left to join Ephemeros at the 2nd belay (about 20m away). FA: brian mattick & Robert Douglas, 2013 | 18 | 35m | |||||
| 29 |
★★ Sleepwalker
An absorbing traverse from left to right across the main slab, with a technical crux pitch. Start at the bottom of the small left-facing corner 20m left of Sunstroke and 5m left of Bird of Prey.
FA: Neil, Phil Montgomery (var.) & Donna Mrockowski, 1979 | 18 | 110m, 4, 2 | |||||
| 30 |
★ Ephemeros
Avvertimento Roccia: Some dodgy flakes on this route post fires A pleasant doddle. P1 makes an excellent alternative start to Sunstroke. Start at the slab 15m right of Tachyon.
FA: Peter Sands & Tony Wood (var.), 1971 | 15 | 75m, 3, 3 | |||||
| 31 |
★ Tachyon
A pleasant first pitch, then a wandering adventure. Start at the right-facing corner crack on the left edge of the main slabs.
FA: Peter Sands & Tony Wood (var), 1971 | 14 | 80m, 4 | |||||
| 32 |
★ Eagle Eye Direct
Pleasant, clean slab climbing on the upper pitches. Start 3m left of Tachyon below a prominent flake.
FA: Ian Taylor & Tony Wood (#1), 1970 | 16 | 65m, 3, 1 | |||||
| 33 |
Eagle Eye
An utterly worthless girdle of this area, unless you're into reliving 1970s exploration. Start 15m left of Tachyon, where a vegetated ramp heads right and a crack/ramp heads left. Wanders easily rightwards, up and down along the upper part of the Northern Slabs.
FA: J. Langford & Tony Wood (alt.), 1970 | 14 | 130m | |||||
| 34 |
Prohibition
An easy enjoyable slab on very coarse rock with a surprisingly exposed second pitch. Start 15m left of Tachyon and up through the scrub, where a vegetated ramp heads right and a crack/ramp heads left.
FA: Tony Wood & Ian Taylor, 1970 | 11 | 74m | |||||
| 35 |
★★ Drunken Delight
Worth the walk if you're not too hung-over, with amazing scoopy rock on the latter pitches. Start as for 'Prohibition'.
FA: Tony Wood, K. Warner (var.) & A. George, 1970 | 8 | 85m, 3 | |||||
| 36 |
★ Picnic
Avvertimento Roccia: Fire damage "For those who like the taste of something smooth, with a few crunchy bits for spice" - Paul Daniel. Start about 20m left of 'Tachyon' (8m left and downhill from 'Drunken Delight') where the vague track re-joins the cliff. Straight up for five metres, then step left and up to the second bolt. Tricky moves to get standing on the horizontal band, then delicately straight up to the big ledge to belay as for 'Prohibition' P1. 3 bolts in all. FA: Paul Daniel & Mike Peck, 1985 | 21 | 20m, 3 | |||||
| 37 |
Bounty
A serious lead. Start 15 metres left of 'Picnic' at a short, thin indistinct crack. Climb the steep wall just left of the crack, stepping right to a runner beneath a bulge (#2 RP). Move up left towards the bulge then face climb right onto the slab. Traverse right to a scoop and second runner (small / medium nut e.g. #4 RP). Continue straight up to easier climbing. Belay on the ledge. Take your pick of the climbs to finish. Can be top-roped from a belay left of the first belay of Aquanaut. FA: Mike Law-Smith, Paul Daniel & Noel Ward, 1986 | 22 X | 27m | |||||
| 38 |
★ Aquanaut Direct Start
An obvious line that looks a bit unpleasant and menacing. Surprisingly steep for the Northern Slabs. Start 25m left of Picnic at a thin crack in a slab beneath a small overhang. Up crack to overlap, climb overlap then either right or left to surmount the small overhang. Continue up the slab to the start of Aquanaut. Either finish up Aquanaut or scramble left along the vegetated ramp to return to the base of the cliff. FA: brian mattick & Robert Douglas, 2013 | 14 | 15m | |||||
| 39 |
★ Aquanaut
Start 35m left of 'Prohibition' (and 10m past Aquanaut Direct Start) at a right-leading, vegetated ramp.
FA: Ian Taylor & Tony Wood, 1970 | 9 | 64m, 2 | |||||
| 40 |
★ Melmoth
Another easy slab, with small gear. Start 15m left of 'Aquanaut' at a wide, shallow groove with incipient cracks.
FA: J. Hoskins, 1971 | 11 | 80m, 2 | |||||
| 41 |
★★★ The Northern Express
Now the longest route in the ACT at over 600 metres. An awesome low commitment adventure and perfect on a sunny Winter day. Start up 'Melmoth' and then reverse 'The Girdle Traverse: Extended Dance Mix' all the way to join 'Hermes' and up this route then climb the scrubby gully and some 4th Class scrambling above to top out at the summit of the mountain. The First Ascent was done mainly simul climbing in 4 huge pitches but it can be done in as many pitches as you need or are comfortable with as there are many options along the way for belays. FFA: Duncan Brown & Ryan Macpherson, 16 Giu 2019 FA: Duncan Brown & Ryan Macpherson, 16 Giu 2019 | 17 | 600m, 4 | |||||
| 42 |
★ Euripus
Parallel to 'Melmoth', starting about 10m to the left. Unlike Melmoth this route feels like a climb.
FA: John Armstrong, 1971 | 11 | 83m | |||||
| 43 |
Staircase
Start 30 metres up the hillside from 'Euripus' and about 10m left of the large block on its second pitch. To avoid the scrub bash to the start it is better to climb the first pitch of Euripus then traverse left along the ledge to below the break in the overlap. Climb the short slab to the overlap. Climb the overlap on good holds then smearing (unprotected crux) up the slab trending left to a horizontal crack at 17m, then up the easier slab to a black water streak. Climb the water streak and belay off a block. Walk off right. FA: J. Hoskins, 1971 | 14 | 45m | |||||
1.9. Darwin Buttress 7 routes in Crag
- Summary:
-
Per lo più Arrampicata trad
Lat / Long: -35.555746, 148.997963
descrizione
This is the low line of outcrops beyond the scree slopes at the end of the North Buttress. The climbs are described from the right.
"There are a few climbs here, although why anybody would do them given what lies within pissing distance is beyond me." - Richard Watts
avvicinamento
Access is by the track running along the top of the 'North Buttress' from the top campsite. Descend the broken hillside and traverse right to the foot of the rocks.
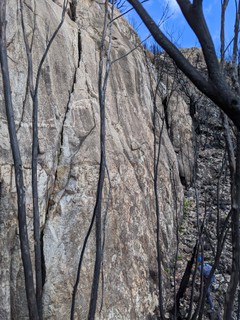 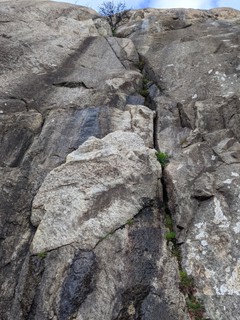 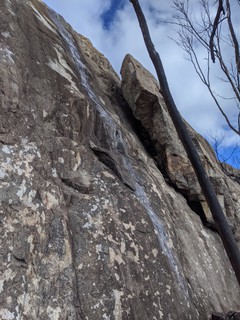 |
||||||||
| Route | Grade | Style | Selected ascents | |||||
|---|---|---|---|---|---|---|---|---|
| 1 |
Slim Fingers Crack
At the extreme right. Up the twin cracks, finishing to the left. FA: Peter Cocker & John Armstrong, 1971 | 11 | 15m | |||||
| 2 |
Argonaut
The obvious crack eight metres left of 'Slim Fingers Crack'. FA: John Armstrong & Peter Cocker, 1971 | 8 | 30m | |||||
| 3 |
Deadwood Crack
The rightwards leaning crack four metres left of and joining 'Argonaut'. FA: Tony Wood & Peter Sands, 1971 | 6 | 30m | |||||
| 4 |
Toblerone
Start as for 'Deadwood Crack'. Step left onto the wall and follow the rightward leaning V groove to the top. FA: Mike Law-Smith, Paul Daniel & Noel Ward, 1986 | 20 | 15m | |||||
| 5 |
Ape Chimney
The undercut cleft just left of 'Deadwood Crack'. Climb to the overhang, move left and up the chimney and wall above, traversing right to finish. FA: Peter Cocker & John Armstrong, 1971 | 12 | 30m | |||||
| 6 |
The Trojans
Climb the black water streak with one bolt, left of 'Ape Chimney'. FA: Adam Blizzard & David Jenkins, 1971 | 19 | 15m, 1 | |||||
| 7 |
This Wheel's on Fire
At the far end, 75 metres left of 'Ape Chimney'. Starts at a thin crack to the right of an obvious square cut gully. Two nuts for aid then up to a ledge. Continue up a corner past a tree. May well have been freed. FA: Bill Wilson & R. Warner, 1973 | 15 M0 | 20m | |||||
1.10. Dirty Harry Rocks 9 routes in Crag
- Summary:
-
Tutti Arrampicata trad
Lat / Long: -35.568226, 149.000234
descrizione
A small collection of boulders, with one excellent crack. The lower part of the outcrop is visible across the valley as you're walking up the Booroomba walk-in path.
avvicinamento
From the Booroomba car park there is an old vehicle track that heads east to the top of Deadmans Hill. Follow this for approximately 1 km. At the top of a steep section the track flattens out, a cairn marks the turn off to Dirty Harry Rocks. From this cairn follow a series of smaller cairns north for 200m to the top tier of Dirty Harry Rocks.
 /74/b4/74b47de6979ca0665b361207d745e9219d2eda40) /44/94/44941ebbfacd1c6efec1168fe91b94fa1bd2616d) /0c/ce/0cce1c3af694d6cd59e1b715149092466c91e7f9) /30/95/30951a9ee07b33bac944166722fdd2eb05754ad1) |
||||||||
| Route | Grade | Style | Selected ascents | |||||
|---|---|---|---|---|---|---|---|---|
| 1 |
Punk
The right leaning chimney capped by a large chockstone. FA: B Aikman & Dave McGregor, Nov 2018 | 13 | 15m | |||||
| 2 |
★ Scorpio
The right leaning off-width 2m right of Punk. FA: B Aikman, Ott 2018 | 19 | 12m | |||||
| 3 |
Feeling Lucky?
The chimney 3m left of Magnum Force. FA: B Aikman, Nov 2018 | 9 | 12m | |||||
| 4 |
★★ Magnum Force
A classic line. The widening crack on the Booroomba side of the outcrop with a hard start. Gear from #0.5 to #4 camalot. FA: John Smart & Ray Lassman, 1976 | 21 | 15m | |||||
| 5 |
Monica
The hand crack through the small roof 5m right of Magnum Force. Harder, higher and better than it looks. Either finish on the ledge or continue up the off-width to the top. FA: Dave Sargent & Mike Law-Smith, 1985 | 17 | 8m | |||||
/f1/aa/f1aaf0afbd07036e18d5b5c11068001d583c61cb) 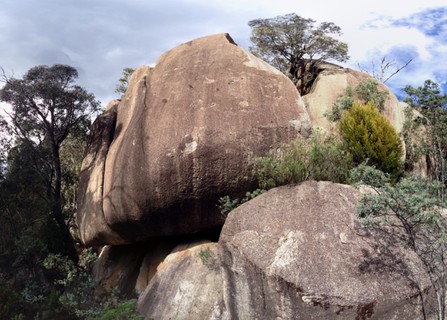 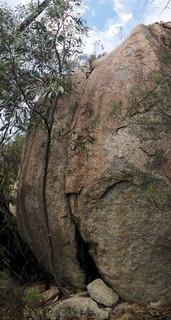 |
||||||||
| Route | Grade | Style | Selected ascents | |||||
| 6 |
★ The Enforcer
The flared hand crack in the alcove 30m down hill from Magnum Force. FA: B Aikman & Dave McGregor, Nov 2018 | 19 | 7m | |||||
|
The following three climbs are on a broken cliff-line 80m downhill from Magnumforce towards Booroomba. The outcrop is clearly visible across the valley when you're walking up the Booroomba walk-in track. | ||||||||
| 8 |
For Better or Worse
A little painful. The hand crack through the roof at the northern (left) end. FA: John Smart, 1980 | 22 | 15m | |||||
| 9 |
On Your Knees Mate
The short off-width 10m right of 'For Better or Worse'. FA: Dan Mannix & Dave Sargent, 1988 | 19 | 8m | |||||
| 10 |
Booze is Bad News Blues
A good finger crack about 20m right of 'For Better or Worse', although the tree at the start means it's not very sustained. FA: Mike Law-Smith & Dave Sargent, 1985 | 21 | 8m | |||||
1.11. Redacted 1 2 routes in Crag
- Summary:
-
Tutti Arrampicata trad
Lat / Long: -35.567408, 148.984217
sommario
An impressive piece of rock offering limited options.
avvicinamento
From the main car park, follow the Australian Alps Walking Track west for 600m. Where the track veers south follow the spur line uphill for another 300m. The crag is on the western side of the spur overlooking Honeysuckle Creek.
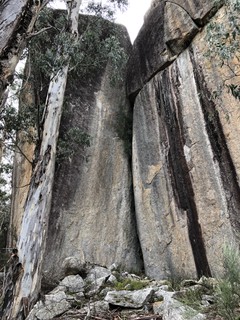 |
||||||||
| Route | Grade | Style | Selected ascents | |||||
|---|---|---|---|---|---|---|---|---|
| 1 |
Friendly Frodo
Up the flared chimney-corner to a small tree, then out the left-hand roof to the top. FA: Norm Booth & Robert Marshall, 1986 | 20 | 25m | |||||
| 2 |
Kitchen Whizz
Slices and minces better than the conventional model! Start 40 metres left of 'Friendly Frodo', on the same boulder. Climb the twin cracks, swinging into the right one to exit. FA: Matt Madin & Adam Blizzard, 1987 | 16 | 20m | |||||